
Flash Fix Mobile: The Trusted Choice for Syracuse Tech Support
Serving Mattydale, North Syracuse & All of CNY Same-Day Repairs Available When your phone falls, its screen breaks or the
Serving Mattydale, North Syracuse & All of CNY Same-Day Repairs Available When your phone falls, its screen breaks or the

You walk outside on a January morning in Syracuse. It’s 18°F, the wind is biting off Onondaga Lake, and your

East Syracuse gamers are familiar with the discomfort of an unresponsive controller. Issues with the PS4 and PS5 controllers, such

If your laptop, MacBook or desktop suddenly stops working altogether, your first thought might be to try to fix it
How to Fix a Nintendo Switch That Won’t Charge When your Nintendo Switch will not charge, it is a really

Flash Fix Mobile: Mattydale’s Home for Expert MacBook Repair Everyone knows how important a MacBook is, and how frustrating it

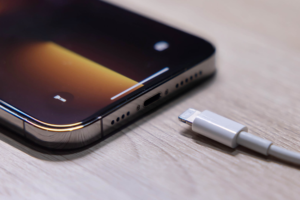
How Often Should You Replace Your iWatch & iPhone Accessories? At Flash Fix Mobile, we know your iPhone and iWatch

What to Do If Your Laptop Overheats During a Syracuse Summer A laptop that suddenly starts overheating is a warning

Tips to Make Your MacBook Last for Years A MacBook is built to last. However, many devices begin to slow

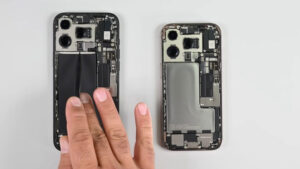
Your iPhone screen is one of the most important parts of your device. A single slip or drop can lead

A failing display rarely stops working without warning. It declines in stages, subtle distortions, brightness instability, or pixel irregularities that
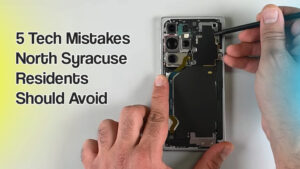
Technology plays a big role in our daily lives, helping us work, stay connected, and shop with ease. In North

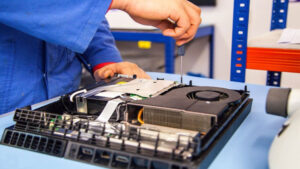
For gamers in Syracuse, a broken PS5 or Xbox can really throw off their daily routine. When a console stops

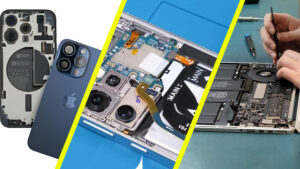
Our iPhones and tablets have become essential in our daily lives. From browsing the internet to storing important files, we
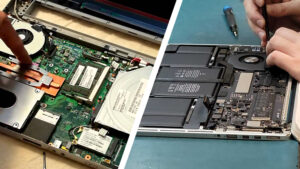
When your laptop or MacBook is not working properly, you need to fix it at the earliest. Don’t go anywhere,
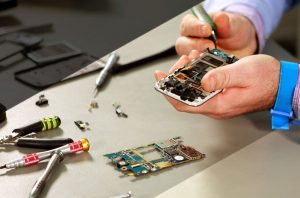
If you’re seeking professional iPhone repair in Mattydale, it’s essential to understand the repair process and recognize the signs that
It can happen to even the best of us in the worst moments. You are leaving the supermarket in Mattydale.
Smartphones are part of our daily lives. We use them to call, text, browse the internet, work, and even shop.
A PlayStation 4 controller suddenly stops working, buttons don’t respond, or it won’t connect. properly. At this point, most gamers

The iPhone 14 Pro Max is undoubtedly an exceptional device, offering advanced features and enhanced performance. However, like any other
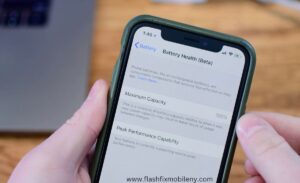
To check your iPhone’s battery health after a reset, follow these steps. Open the “Settings” app, then tap on “Battery.”

Is your Logitech Keyboard not working but the mouse is working fine? Don’t worry. We’re here with some easy solutions. Several

Fixing a cracked laptop screen without replacing it is possible with various DIY solutions. Start by fixing dead pixels using

Fixing scratches on liquid screen protectors is challenging but not something that you cannot do at home. To address scratches
In a world dominated by technology, the iPhone, a flagship device renowned for its quality, often faces issues related to

Connect your Slim Folio to your iPad effortlessly with these steps. Ensure compatibility, activate the keyboard, and enable Bluetooth on

Discovering that your Logitech iPad keyboard needs to be fixed can be frustrating, especially when you rely on it for

In the ever-evolving world of smartphones, understanding the intricacies of your iPhone Pro Max’s battery health is crucial. Maintaining optimal

Picture this: you’re holding your sleek and shiny iPhone 15, and suddenly, you notice a horrifying crack on the back

So, you’ve got the shiny new iPhone 15, but you’ve noticed that the battery life isn’t quite living up to

Imagine this: You’re all set to dive into some serious work on your iPad using your trusty folio keyboard, and

Alright, folks, let’s talk about a not-so-fun topic – hairline cracks on your iPad. We know how frustrating and nerve-wracking

Imagine the feeling of watching your beloved iPhone submerged in water or accidentally soaked due to a sudden splash. It’s

If you are experiencing the complicated issue of your iPhone’s battery reducing even as charging, you are not alone. But
If you find yourself fixing an iPhone 14 overheating issue, don’t worry! In this comprehensive guide by Flash Fix Mobile,

Every autumn, tech enthusiasts, iPhone loyalists, and Phone Repair Shop experts are abuzz with anticipation. This year, the whispers, tweets,

Upgrading your computer’s hard drive can be a game-changer in terms of performance and storage capacity. However, the idea of

In today’s digital age, a frozen computer screen can be incredibly frustrating and disruptive. Whether you’re working on an important

In the world of modern technology, our smartphones are not just communication devices, but also our personal cameras, capturing life’s

In the ever-evolving world of smartphones, the camera has become a centerpiece of innovation. With each new generation of iPhones,

In today’s fast-paced world, our smartphones have become an indispensable part of our lives. From communication to entertainment, information, and

types of phone damages Types of Phone Screen Damages Types of Phone Screen Damages cheap phone repair shop. Cracks & Shatters

Your iPhone is not just a device; it’s a valuable companion that keeps you connected, organized, and entertained. The sleek

The iPhone camera has revolutionized the way we capture and preserve memories. With each new model, Apple continues to enhance

In today’s digital world, smartphones have become an important part of our lives. But sometimes, accidents happen, and our phones

Sound quality plays a vital role in our smartphone experience, whether making calls, listening to music, or watching videos. However,

App updates are essential to keep your iPhone functioning smoothly and efficiently. However, sometimes iPhone users encounter issues when updating

Touch ID is a convenient feature on the iPhone that allows users to unlock their device and authenticate purchases with

phone repair shop If you’re in Mattydale and looking for a reliable and affordable phone repair shop, Flash Fix Mobile
Does Your Laptop Need A Repair? Is your laptop not functioning properly? Your laptop may need to be fixed if

Why Does My Computer Randomly Freeze? Nothing is more annoying than having your computer freeze just as you are about
Need To Upgrade Your Hardware? Contact Us For organizations, purchasing new hardware can be a great investment because it can