What Causes LCD Screen Damage on Phone?

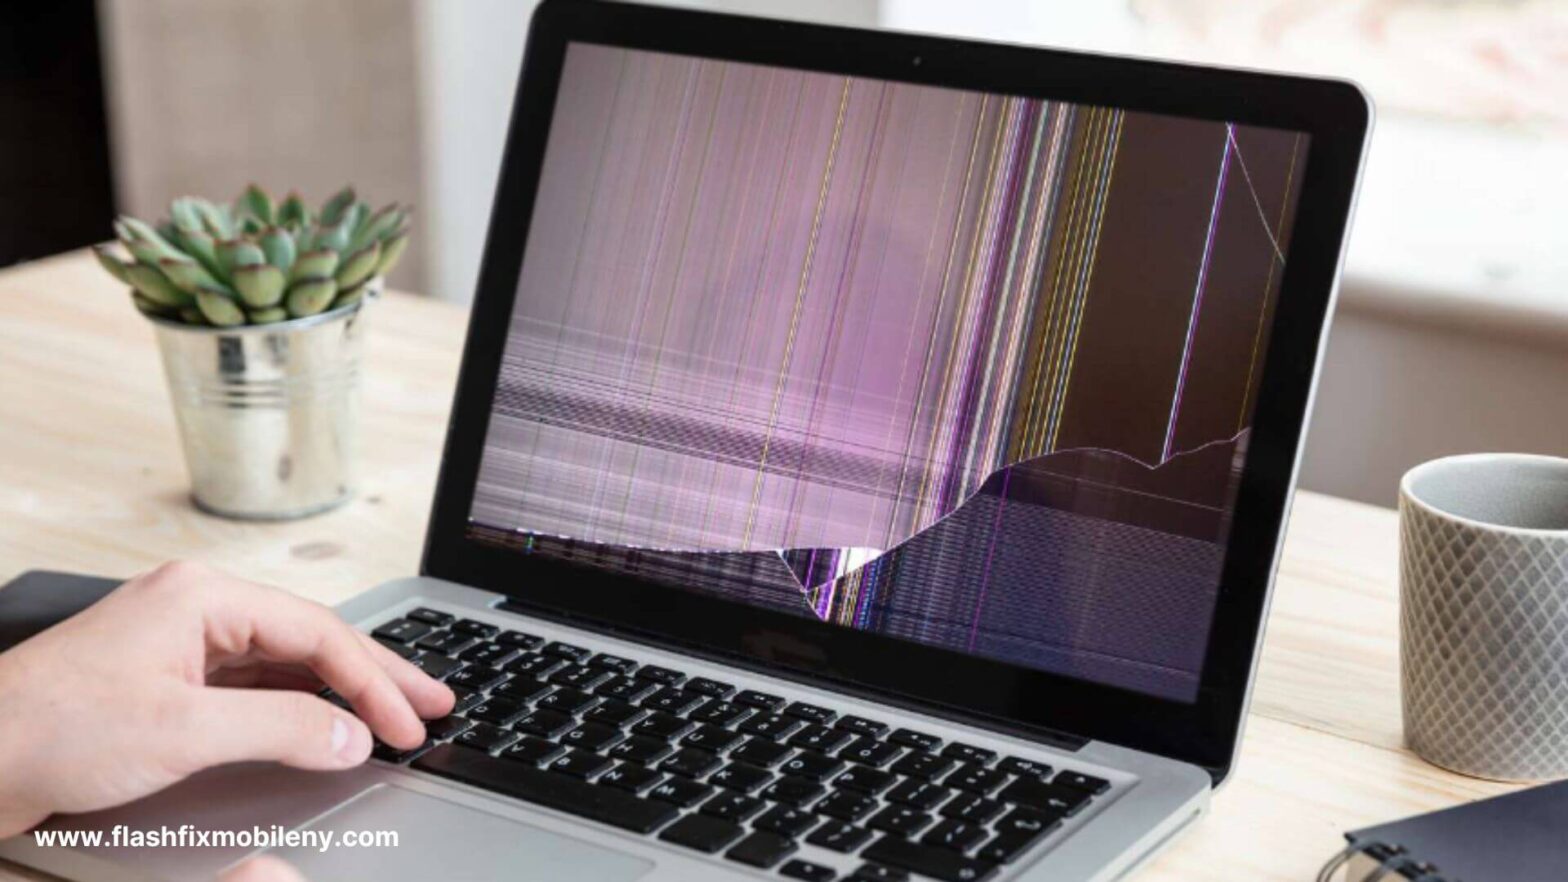
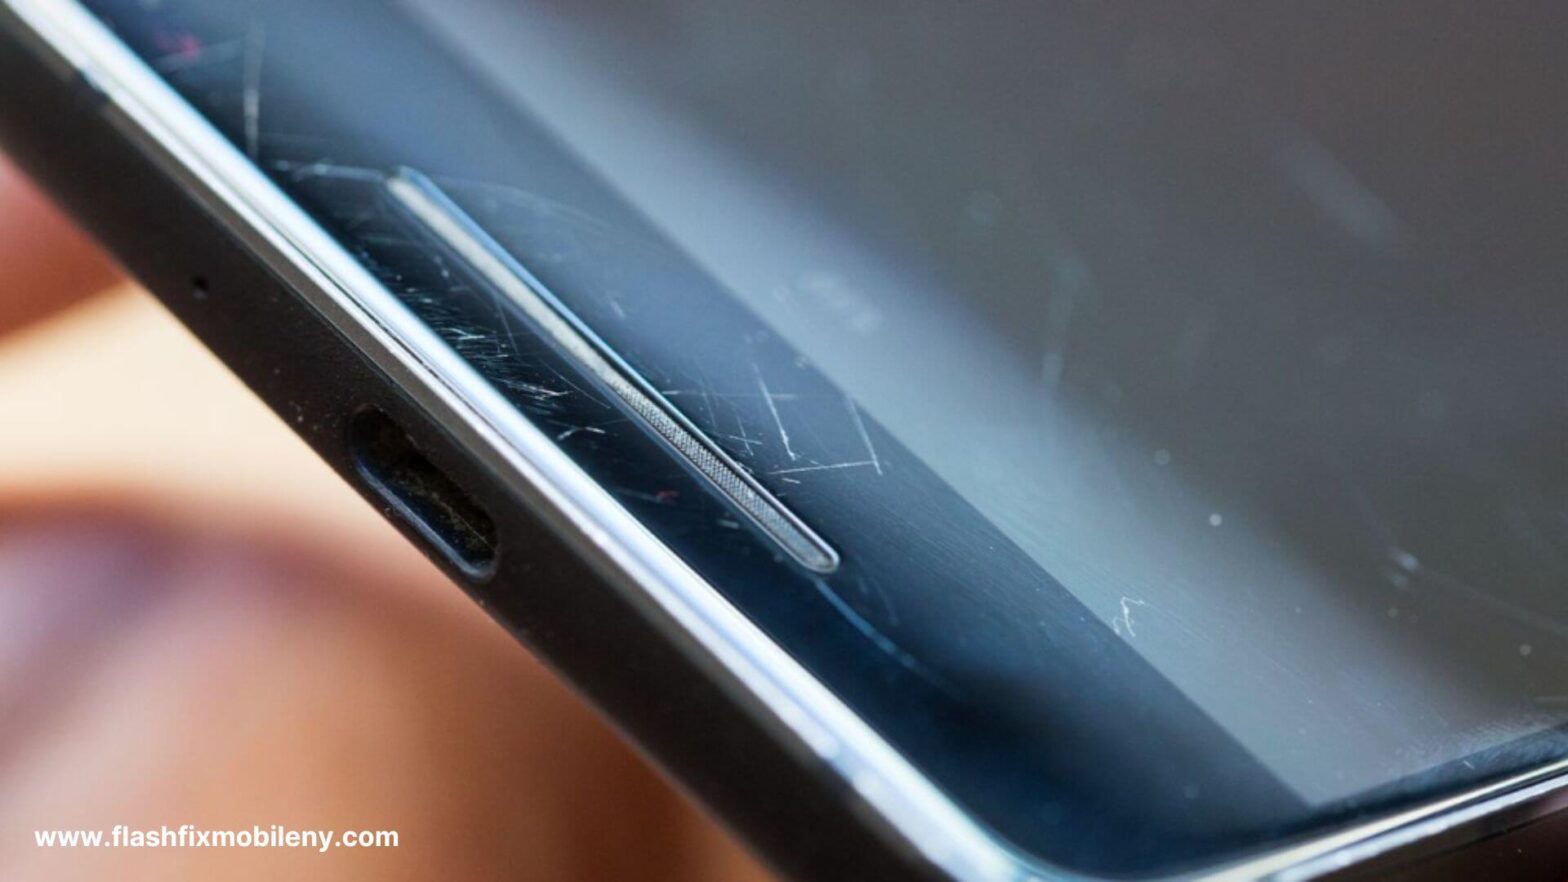
Smartphones have become a crucial part of our lives. Without them, our whole routines get disrupted. However, just like any other electronic gadget, they too are susceptible to damage, and one of the common damage damage is LCD screen damage. LCD stands for Liquid Crystal Display, it is an integral component of your mobile phone as it is responsible for displaying images and videos and all the other features on your phone screen. Damage to it can ruin your entire user experience, and getting it replaced is a bit costly too. Therefore, to prevent your phone from this damage, you must understand what causes LCD screen damage on phones.  Accidental drops or impacts are common culprits, causing cracks or fractures on the screen. Scratches, though minor, can accumulate over time and affect the screen’s clarity. Other issues, such as water damage, may lead to malfunctions or a complete failure of the screen. Additionally, prolonged use can contribute to problems like screen burn-in, where persistent display of images leaves lasting imprints. Each of these issues requires specific solutions for repair or replacement, emphasizing the importance of protective measures to prevent LCD screen damage. 05 Most Common Causes of LCD Screen Damage 1. Physical Damage Physical damage to the screen is the most common cause of LCD screen damage; accidental drops or harsh impacts can cause cracks and scratches on the phone screen, which, if left unaddressed, can lead to bigger problems such as dead pixels and display issues. There are various types of phone screen damages that may occur, including impact-related cracks, scratches, and dead pixels. It is recommended to invest in a good quality screen protector and a hard case to prevent your phone from physical damage and mitigate the risk of different screen issues. At Flash Fix Mobile, we also offer professional services to address various types of phone screen damages, ensuring a comprehensive solution for our customers. If you are in the market for superclone , Super Clone Rolex is the place to go! The largest collection of fake Rolex watches online! 2. Water Damage Water damage can seriously harm your phone’s LCD screen, causing disruptions and potential malfunctions. If your iPhone gets wet and turns on, it’s crucial to address the issue promptly. At Flash Fix Mobile, we specialize in repairing water damage, ensuring your device functions optimally. 3. Poor Maintenance Poor maintenance is another common cause of LCD Screen damage, not cleaning your phone properly can cause scratches and cracks to form on the screen and exposure to extreme temperatures or chemicals can also cause irreversible damage to the phone’s LCD screen display. 4. Overheating Overheating poses a significant threat to phone LCDs, causing blurred or distorted displays and potential irreversible damage. Promptly addressing overheating issues is crucial to prevent long-term damage. At Flash Fix Mobile, we specialize in resolving overheating problems and providing expert LCD replacement services for optimal phone functionality. 5. Manufacturing Defects This is very rare but in some cases, it may result from manufacturing defects. In defective manufacturing, faulty components are used in the phone, which may result in dead pixels, screen flickering, or even a distorted display. How do you fix a broken LCD screen on a phone? It is not possible to fix a broken LCD screen because even a small crack on the LCD makes the screen unresponsive to touch. The only way to make it work again is to replace it with a new LCD screen.As stated in this article, you can browse your selection of available deals on smartphones and top brands and explore the cell phone service plans that best suit your needs. Why does my phone screen get damaged? One of the most common damage phone users experience is a cracked phone screen. This usually happens from accidental drops or impacts. It is important to address the issue timely as not fixing cracked screens can lead to bigger problems. It is advised to use screen protectors and hard phone cases to prevent screen damages How do I know if my phone has LCD problems? Inspect the screen carefully, does it display any signs of black spots, lines, or patterns? If it does, these are not the signs of a crack but damage to the LCD display screen of your phone.  Conclusion So these are some of the most common causes of LCD screen damage. To protect your phone from these damages, invest in a good quality phone protector and a hard case, avoid exposing your phone to moisture and extreme temperatures, and keep it well-maintained.  In case of irreversible damage, you must contact professionals to get quality screen replacement services. At Flash Fix Mobile, we have a team of expert technicians who make use of advanced tools and technology to ensure quality repair service.

How To Save Battery on iPhone 14 Pro Max?

The iPhone 14 Pro Max is undoubtedly an exceptional device, offering advanced features and enhanced performance. However, like any other electronic gadget, its efficiency is closely linked to battery health. Therefore, it is imperative for you to understand how to save battery on the iPhone 14 Pro Max as it directly links with the user experience, the device’s longevity, and its functionality.  Preserving battery life on your iPhone 14 Pro Max involves a combination of strategic settings and careful usage habits. Experts recommend keeping your device’s screen brightness low or enabling auto-brightness. It is also advised to enable Low power mode as it limits the background processes when battery levels are critical.  Manage App refresh and location services through the privacy settings. Another thing you should be careful about is keeping your phone’s software up to date, as updates are introduced mainly by the manufacturer for enhanced battery efficiency. Disabling features like dynamic wallpapers and widgets are also recommended for further conservation. 7 Tips To Save Battery on iPhone 14 Pro Max 1. Enable Low Power Mode To further maintain battery health on the iPhone 14 Pro Max, take advantage of the built-in feature designed for this purpose. This feature makes your iPhone consume less battery by limiting background processes, reducing system animations, and lowering the screen brightness. Enabling this feature on your phone can contribute significantly to saving battery and ensuring optimal performance. 2. Close Unnecessary Apps Running in the Background Apps running in the background of your phone consume a lot of battery. Hence, experts recommend closing unnecessary apps to save battery life. To do this, swipe your phone upwards from the down and swipe away the apps you are not using. This trick is really useful for saving battery life on the iPhone 14 Pro Max. 3. Lower Screen Brightness You must adjust your iPhone’s screen brightness to make the most of its battery. The experts recommend keeping your phone’s display brightness low at indoor places or enabling the auto-brightness feature. This feature adjusts the screen’s brightness according to the need, preventing battery drainage. 4. Adopt Efficient Charging Practices In order to enjoy a prolonged battery life and to save battery on the iPhone 14 Pro Max, it is advised to practice efficient charging habits. Experts recommend charging your phone when the battery gets below 20% and stopping at 80%. You also must not keep your phone plugged in overnight. Although it may not cause direct damage to the device’s battery it leads to excess cycles on the battery, causing heat built-up which in turn wears down your phone’s battery health.  5. Use Manufacturer-Approved Chargers If you notice decreasing battery while charging, consider inspecting your charging cable and adapter for any signs of damage or wear. Using a certified charger and cable can alleviate this issue and ensure a reliable and efficient charging experience. 6. Avoid Extreme Temperatures Moreover, if you are facing overheating problems, it is crucial to keep your phone in controlled environments to prevent it from extreme temperatures. Leaving your phone in a too-cold or too-hot environment for a prolonged period of time can impact not only your phone’s battery life but also its overall performance. Hence, avoid leaving your phone in a heated car or under direct sunlight for too long. In case of very low temperatures, keep it in your jacket’s pocket to protect it from a too-cold environment. 7. Update to the Latest iOS Version To save battery on iPhone 14 Pro Max, always keep your phone updated to the latest iOS version. These software updates with improved features and enhanced battery efficiency are introduced by the manufacturer. However, it’s important to note that some users have reported iPhone app update problems after installing certain iOS updates. These issues may include app crashes, compatibility issues, or unexpected behavior. It’s advisable to check user reviews and feedback before updating your apps or iOS to ensure a smooth experience. Why is my iPhone 14 Pro Max battery draining so fast? Check if your iPhone 14 Pro Max’s location services are on. Keeping the location services enabled on your iPhone 14 consumes a lot of battery. This service keeps running in the background, making the iPhone’s temperature high, and resulting in faster battery drainage.  How do I charge my iPhone 14 Pro Max to maintain battery health? To maintain battery health on your iPhone 14 Pro Max, do not fully charge it. Charge it around 50%. Keep it in a cool environment, and use original, manufacturer-approved charging cables and adapters.  When should I charge my iPhone 14 Pro Max battery? It is ideal to charge your iPhone 14 Pro Max when the battery goes below 20%. This helps avoid the risk of the battery going to zero when you are not in a position to charge your phone.  Conclusion So these are some of the practices recommended by the experts to save battery on iPhone 14 Pro Max. In case you feel like you have an old or worn-out battery, you must get it replaced. However, you must select a reputed service provider for this purpose. At Flash Fix Mobile, a trusted iPhone repair service, we make use of original replacement components for processes such as battery replacement and utilize advanced tools and technology to ensure quality repair service.

How To Check iPhone Battery Health After Reset?

To check your iPhone’s battery health after a reset, follow these steps. Open the “Settings” app, then tap on “Battery.” Inside the Battery menu, select “Battery Health.” Here, you’ll find crucial information about your battery’s capacity and performance. The “Maximum Capacity” percentage indicates your battery’s current capacity compared to its original capacity when new.  Additionally, you’ll see if your device is experiencing any performance management due to an aging battery. This feature provides valuable insights into the overall health of your iPhone’s battery, allowing you to monitor its condition and take appropriate actions if needed. 5 Steps To Check iPhone Battery Health After Reset? 1. Update To The Latest Software Before diving into how to check iPhone battery health after reset, ensure your iPhone is running the latest iOS version. Software updates often include optimizations and improvements that can positively impact battery performance. 2. Use The Built-In Tool Navigate to the “Settings” app on your iPhone, tap on “Battery,” and then select “Battery Health.” Here, you’ll find the “Maximum Capacity” percentage, indicating your battery’s current capacity compared to its original state. Additionally, you can check if your device is subject to any performance management due to an aging battery. 3. Check The Maximum Capacity To address decreasing battery while charging, monitor the “Maximum Capacity” of your battery. A higher percentage signifies better health. If capacity drops significantly, it may be time to consider a battery replacement. 4. Make use of Third-party Apps For detailed analysis of app update problems, explore third-party apps on the App Store. They offer insights into battery performance, charging cycles, and overall health. 5. Seek Professional Help From Flash Fix Mobile If you encounter persistent battery issues or need expert advice, turn to professionals. Flash Fix Mobile offers specialized services, ensuring your iPhone’s battery is examined thoroughly, and appropriate actions are taken. 7 Tips to Improve your iPhone Battery Health? 1. Optimize Settings If your iPhone battery is original, optimize settings like screen brightness, background app refresh, and location services for a balance between functionality and battery conservation. 2. Manage Background Apps Close or restrict unnecessary background apps that consume battery power when not in use. 3. Enable Low Power Mode Activate Low Power Mode in settings when your battery is running low to reduce power consumption temporarily. 4. Monitor Battery Usage Review the Battery section in Settings to identify apps consuming significant battery resources and make adjustments accordingly. 5. Avoid Extreme Temperatures To maintain your battery health, ensure your iPhone stays within the recommended temperature range. Extreme heat or cold can adversely affect the battery’s performance over time. How do I check battery health on iPhone reset? To check your iPhone’s battery health after a reset, go to “Settings,” then tap on “Battery,” and finally select “Battery Health.” Here, you can find valuable information about your battery’s capacity and performance. A reset won’t affect your ability to monitor battery health through these settings. Does resetting the iPhone affect battery health? Generally, a routine reset, like restarting your iPhone, won’t directly impact battery health. However, if you perform a factory reset or erase all content and settings frequently, it may contribute to increased battery cycles, potentially affecting long-term health. Can you bring back the 100% battery health on iPhone? Reaching 100% battery health on an iPhone is challenging as it reflects the original maximum capacity. While certain practices, like avoiding extreme temperatures and not letting your battery drain completely, can help maintain health, achieving a consistent 100% may not be realistic over extended usage. Regularly monitoring and following best practices can, however, optimize your battery’s performance. Conclusion For iPhone repair services, ensure to check your device’s battery health post-reset as a proactive step for optimal performance. Regular assessments, whether using built-in tools, third-party apps, or seeking professional help like Flash Fix Mobile, help address potential issues promptly, enhancing the longevity of your iPhone’s battery and ensuring a reliable smartphone experience.

Logitech Bluetooth Keyboard Not Working But Mouse Is

Is your Logitech Keyboard not working but the mouse is working fine? Don’t worry. We’re here with some easy solutions. Several troubleshooting steps can help resolve the issue. Begin by checking the battery levels in the keyboard and ensuring the USB receiver is properly connected. Attempt to resync the keyboard with the receiver or perform a reset. Update the keyboard drivers to ensure compatibility. Disabling “Off” keys and reinstalling the Logitech software might help address any software-related issues.  Additionally, inspect the keyboard for physical damage, and if problems persist, consider seeking professional assistance for a thorough examination. 7 Solutions To fix your Logitech Bluetooth Keyboard Working issue 1. Restart Keyboard To troubleshoot Logitech Bluetooth Keyboard issues, including Slim Folio, start by restarting the keyboard. A simple reboot can often resolve minor glitches and connectivity issues, ensuring smooth operation. 2. Check the Battery Levels Ensure that the batteries in your keyboard have sufficient power. Low battery levels can lead to connectivity problems. 3. Ensure The USB Receiver is Connected Verify that the USB receiver is securely connected to your computer. A loose connection may result in intermittent keyboard functionality. 4. Resync The Keyboard Folio Keyboard not working? Resync with USB receiver per Logitech instructions for your model to establish a stable connection. 5. Disable Filter Keys Filter Keys can interfere with keyboard responsiveness. Disable this feature through your computer’s settings to see if it resolves the issue. 6. Reinstall Logitech Software For Logitech iPad Keyboard issues, uninstall and reinstall the Logitech software for the latest drivers and updates. 7. Seek Professional Assistance If all else fails, and your Logitech wireless keyboard continues to malfunction, it’s advisable to seek professional assistance. A technician can diagnose thoroughly to identify and address any underlying issues. Why is my Logitech wireless keyboard not working but the mouse? If your Logitech wireless keyboard is not functioning, there could be several reasons behind this issue. Begin by checking the battery levels as low power might be causing connectivity problems. Ensure the USB receiver or Bluetooth connection is properly established. If the problem persists, consider resetting the keyboard or reinstalling the Logitech Options software. How do I reset my Logitech Bluetooth keyboard? To reset your Logitech Bluetooth keyboard, refer to the user manual for specific instructions for your model. Generally, the reset process involves pressing a reset button or a combination of keys on the keyboard. Resetting can help resolve connectivity issues and restore the keyboard to its default settings. Why isn’t my Logitech keyboard typing? If your Logitech keyboard is not typing, confirm it is properly connected to your computer. Check for any physical damage, loose components, or foreign objects affecting its functionality. Additionally, ensure that the keyboard is recognized in your device’s settings. If the problem persists, consider troubleshooting steps such as restarting your computer, checking for software updates, or consulting professional repair services. Conclusion Troubleshooting a Logitech wireless keyboard that’s not working but the mouse is working fine requires a systematic approach. You can often resolve common issues by restarting the keyboard, checking battery levels, ensuring proper USB receiver connection, resyncing, disabling filter keys, and reinstalling Logitech software. If problems persist, seeking professional assistance ensures a comprehensive examination and precise solutions to restore your keyboard’s functionality. Contact us at Flash Fix Mobile for instant and effective solutions to all your computer-related issues.

How To Fix Cracked Laptop Screen Without Replacing

Fixing a cracked laptop screen without replacing it is possible with various DIY solutions. Start by fixing dead pixels using online tools. Connect to an external monitor to continue using your laptop. Update video card drivers to ensure optimal performance. Applying a screen protector may help hide minor cracks. However, for extensive damage, seeking professional help or considering a screen replacement might be necessary for a lasting solution. In order to find an effective solution, it is important to understand what causes the laptop screen to crack.  What Causes Laptop Screen To Crack? When a laptop screen is physically damaged, like having cracks, it usually happens due to incidents like dropping the laptop or something heavy falling onto it. Surprisingly, even a tiny speck of sand between the screen and the keyboard can lead to a cracked screen. Other reasons for a malfunctioning or seemingly broken laptop screen include stuck pixels, screen burn, backlight problems, cables and connectors, or outdated drivers. Ways To Fix Cracked Laptop Screen Without Replacing Restart the Laptop Sometimes, a simple restart can work wonders. Restarting your laptop may help resolve minor glitches that could be affecting the display. This basic troubleshooting step might restore normal functionality if the crack is not severe. Try an External Monitor Connect your laptop to an external monitor to check if the issue is isolated to the laptop screen. If the external monitor displays correctly, it suggests that the problem lies with the laptop screen itself. Examine for Dirt and Debris Inspect the cracked area for any accumulated dirt or debris. Dust particles can worsen the appearance of the crack and affect the overall display quality. Gently clean the surface with a soft, lint-free cloth to minimize these visual disturbances. Fix Dead Pixels Dead pixels can be a common issue on cracked screens. There are online tools and apps designed to help fix dead pixels. Running these programs might not completely eliminate the crack, but addressing dead pixel-related issues can enhance the overall visual experience. Update Your Video Card Drivers Outdated or incompatible video card drivers may contribute to display problems. Visit the official website of your laptop’s manufacturer or the graphics card provider to download and install the latest drivers. Updated drivers can often improve screen performance. Fix Screen Burn-in Screen burn-in occurs when static images are displayed for extended periods, leaving a faint imprint on the screen. While not a direct solution for a cracked screen, addressing burn-in issues can improve overall display quality. Use screensavers and avoid prolonged static images. Check the Screen and Backlight Connections If the crack is severe, it may affect the internal connections of the screen and backlight. Opening up a laptop requires technical expertise, so seek professional help to inspect and potentially repair internal connections. A technician can identify if there are any loose or damaged components contributing to the issue. Offering popular women’s necklaces such as pendants, chokers and. Shop for jewelry in a variety of metals and gemstones to suit any occasion. Try each of the steps mentioned above to fix a cracked laptop screen without replacing it. In case these methods do not work, get your laptop screen replaced by us at Flash Fix Mobile. We make use of high-quality, original replacement components to ensure quality repair service.  Conclusion While these methods to fix cracked laptop screens without replacing them may improve the visual experience and functionality of a cracked laptop screen, it’s essential to recognize their limitations. Cracked screens are physical damages that may not be fully remedied without replacing the screen. If the crack is extensive or impacting the laptop’s usability, it’s advisable to consult professional repair services. Our professional technicians can assess the severity of the damage and provide appropriate solutions, ensuring your laptop’s longevity and optimal performance. Important FAQs Q1. Can cracked laptop screens be repaired? Yes, cracked laptop screens can be repaired, depending on the extent of the damage. Minor cracks or damages to the screen may be fixable through professional repair services. Q2. Can you fix a cracked laptop screen without replacing it? Yes, some screen damage can be fixed without replacing the entire screen. Repair methods such as screen recalibration or pixel fixing may help with minor issues like scratches or dead pixels. Q3. How do you repair laptop screen damage? Repairing laptop screen damage involves assessing the severity of the damage. DIY solutions like screen repair kits, fixing dead pixels, or applying screen protectors can be effective for minor issues. Professional repair services may be necessary for major damage, including screen replacement if required.

How to Fix Scratches on Liquid Screen Protector?

Fixing scratches on liquid screen protectors is challenging but not something that you cannot do at home.  To address scratches on a liquid screen protector, take out a small amount of toothpaste and apply it to the scratched area. Then, rub the area in a clockwise motion using a soft, clean cloth to diminish the appearance of scratches. This method may improve the appearance of scratches on the liquid screen protector. However, to ensure success, it is recommended that a new layer of the liquid screen protector from phone repair experts is applied. Material Required to Fix Scratches on the Liquid Screen Protector The scratch removal process can be done easily at home with these things: Meta Polish Baking Soda Tooth Paste Soft Cloth Water or Alcohol for Rubbing Scratch Remover Pen Tips To Fix Scratches on Liquid Screen Protector Baking Soda Method Scratches on a liquid screen protector can be frustrating, but the baking soda method offers a DIY solution. Create a paste with baking soda and water, apply it to the scratches, and gently rub in a circular motion with a soft cloth. Wipe off the residue, and the scratches may be less noticeable. Toothpaste Method Toothpaste, a household remedy, can work wonders when it comes to fixing scratches on liquid screen protectors. Take out a small amount of toothpaste and rub it gently clockwise using a clean, soft cloth. This method can help diminish the appearance of scratches.  Utilizing Metal Polish Metal polish, known for its abrasive properties, can be effective in reducing scratches on a liquid screen protector. Apply a small amount to the scratched area, rub gently with a soft cloth, and wipe off any residue. This method requires caution, as excessive use may damage the screen. Using a Scratch Remover Pen Specialized scratch remover pens designed for screens can be a targeted solution. Apply the pen to the scratched area, following the manufacturer’s instructions. These pens often contain a clear solution that fills in scratches, making them less visible. Wipe away excess product and enjoy a rejuvenated screen. Another Screen Protector If DIY methods don’t yield satisfactory results, consider applying a new screen protector. Remove the old protector, clean the screen thoroughly, and carefully apply the new one. While this doesn’t repair scratches, it offers a fresh start with added screen protection. You can also get your liquid screen protector replaced by us at Flash Fix Mobile. We only make use of high-quality screen protectors to ensure effective protection.  Conclusion Fixing scratches on liquid screen protectors requires experimentation with different methods. The baking soda and toothpaste methods are cost-effective, while metal polish and scratch remover pens offer targeted solutions. If all else fails, replacing the screen protector is a reliable option. Choose the method that suits your preferences and the materials at hand, always exercising caution to avoid further phone screen damages. Important FAQs Q1. How do you fix a scratched liquid glass screen protector? Scratches on a liquid glass screen protector can be improved using a gentle abrasive like toothpaste. Take out a small amount of toothpaste and gently rub it in a clockwise motion, using a clean, soft cloth to reduce the appearance of scratches.  Q2. What should you do if your liquid screen protector cracks? Unfortunately, if a liquid screen protector cracks, it cannot be repaired. Consider replacing it with a new one to maintain optimal protection for your device. Q3. What should you do if your screen protector is scratched? For traditional screen protectors, if scratched, you can replace them easily. Peel off the old one, clean the screen, and apply a new protector for continued protection.

How To Know If iPhone Battery Is Original

In a world dominated by technology, the iPhone, a flagship device renowned for its quality, often faces issues related to battery replacements. To determine the authenticity of your iPhone battery, follow these comprehensive steps.  Firstly, check the serial number and IMEI by navigating to Settings > General > About and cross-referencing with the original packaging or purchase receipt. Utilize Apple’s Battery Health feature in Settings > Battery > Battery Health for accurate information on maximum capacity and performance. Additionally, analyze the physical characteristics, noting the clean and professional appearance of the original batteries. Consider using trusted third-party apps like Battery Life or CoconutBattery for insights into battery specifications, exercising caution to ensure app credibility and avoid potential security risks.  Steps to Check if iPhone Battery is Original Check the Serial Number and IMEI Every iPhone battery is assigned a unique serial quantity. To verify the legitimacy of your iPhone battery, begin by finding this wide variety of serial numbers.  Head to Settings > General > About, and scroll to discover the Serial Number. Cross-test this number with the one on the authentic Apple packaging or your device’s purchase receipt.  Additionally, confirm the IMEI (International Mobile Equipment Identity) wide variety, making sure it fits the only one related to your device. Utilize Apple’s Battery Health Feature Apple gives an integrated tool for monitoring iPhone battery health. Access the Battery Health feature through Settings > Battery > Battery Health.  Here, you may get admission to crucial statistics about your battery, together with most ability and height performance functionality. An authentic iPhone battery will consistently show accurate records, even as a counterfeit one may exhibit discrepancies or irregularities. Verify through Apple Authorized Service Providers For a foolproof method, consider seeking assistance from Apple Authorized iPhone Service Providers. These professionals are trained to identify genuine iPhone components, including batteries. Schedule an appointment at an authorized service center, and their expert technicians can inspect your device to determine the authenticity of the battery and also provide you tips to maintain the battery health of your iPhone. Inspect the Packaging and Documentation Genuine Apple products come with meticulous packaging and documentation when purchasing an iPhone or a replacement battery.  Examine the packaging for holographic logos, embossed lettering, and overall high-quality printing. Genuine batteries also include detailed documentation, such as user manuals and safety information. Lack of these elements may indicate a non-original product. We recommend buying your favorite at super low prices with free shipping, and you can also pick up your order at the store on the same day. Analyze the Physical Characteristics Original iPhone batteries exhibit certain physical characteristics that set them apart from counterfeit counterparts.  Apple batteries typically have a clean and professional appearance, with neatly arranged components. Counterfeit batteries may show signs of poor craftsmanship, including uneven seams, misaligned logos, or inconsistent font styles on labels. Use Third-Party Apps Several third-party apps are designed to provide information about your iPhone’s hardware components, including the battery. Apps like Battery Life or CoconutBattery can offer insights into the battery’s specifications and performance.  However, exercise caution when using third-party apps and ensure they are reputable to avoid potential security risks. Final Thoughts All in all, ensuring the authenticity of your iPhone battery is not just about preserving the device’s integrity but also safeguarding your investment.  By employing a combination of the methods mentioned above, users can confidently verify whether their iPhone battery is original.  Lastly, if you’re looking for the best Phone repair services in Mattydale, you should choose none other than Flash Fix Mobile, a leading cell phone repair shop in Mattydale, NY. FAQs Q1. Can you tell if the iPhone battery has been replaced? Yes, you can check the battery status in the Settings app. If it displays “Service,” it indicates that the battery may need to be replaced. Q2. How can I check if my iPhone battery is good? Utilize the built-in Battery Health feature in Settings > Battery to assess your iPhone’s battery condition. It provides information on maximum capacity and peak performance capability. Q3. What is a genuine iPhone battery? A genuine iPhone battery is an original, authentic component produced by Apple. It meets the company’s quality standards and is designed for optimal performance and compatibility with iPhone devices

How To Connect Slim Folio To iPad

Connect your Slim Folio to your iPad effortlessly with these steps. Ensure compatibility, activate the keyboard, and enable Bluetooth on your iPad. Initiate pairing by holding the Bluetooth button on the Folio until it’s discoverable, allowing your iPad to establish a stable connection. Test the keyboard in a text document to unlock the full potential of your iPad without getting any kind of repair services. Steps To Connect Slim Folio To iPad Explore these simple steps to connect your Slim Folio and maximize your iPad’s potential. Check Its Compatibility Before diving into the connection process, ensure that your Slim Folio is compatible with your iPad model. Check the product specifications and confirm that it supports your iPad version to guarantee a seamless pairing experience. Turn On The Power Of Folio Keyboard Locate the power switch on your Slim Folio’s keyboard and turn it on. Most Slim Folios have a dedicated power button, often located on the side or back of the keyboard. Activating the keyboard’s power is the first step towards establishing a connection with your iPad. Enable Bluetooth On Your iPad Unlock your iPad and access the Settings menu. Please navigate to the Bluetooth section and toggle it on. Enabling Bluetooth is crucial for the communication between your iPad and the Slim Folio. Once activated, your iPad will start searching for nearby Bluetooth devices. Pair Your Folio & iPad Together With Bluetooth enabled on your iPad, it’s time to initiate the pairing process. On your Slim Folio, locate the Bluetooth button, usually positioned near the power switch. Press and hold this button until the LED indicator starts flashing, indicating that the Folio is discoverable. Your iPad should detect the Slim Folio in the list of available devices. Select it to establish the connection. Test The Keyboard Once paired, it’s advisable to test the keyboard functionality. Open a text document or any application that requires keyboard input and ensure that the Slim Folio responds accurately to your keystrokes. Testing the keyboard ensures that the connection is stable and that all features are operational. Final Thoughts All in all, connecting your Logitech iPad keyboard or Slim Folio keyboard is a quick and rewarding process. The Slim Folio brings convenience and efficiency to your fingertips, turning your iPad into a versatile tool for work or leisure. By following these connection steps and troubleshooting tips by Flash Fix Mobile, you can seamlessly integrate your Slim Folio with your iPad, unlocking a world of productivity and convenience without the hassle of visiting a repair shop. FAQs Q1: What should I do if my Slim Folio is not pairing with my iPad? Answer: If your Slim Folio is not pairing, ensure that both devices have sufficient battery power. Restart both the iPad and the Slim Folio, and repeat the pairing process. If issues persist, consult the product manual or contact customer support for assistance.https://www.traditionrolex.com/11 Q2: Can I connect my Slim Folio to multiple devices simultaneously? Answer: Slim Folios are typically designed to connect to one device at a time. To switch devices, disconnect the Folio from the current device and follow the pairing process on the new device. Q3: How do I conserve battery life on my Slim Folio? Answer: To extend battery life, turn off the Slim Folio when not in use. Additionally, adjust the backlight settings and use the keyboard’s power-saving features if available. Regularly charging the Folio ensures optimal performance

How to Fix Logitech iPad Keyboard Not Working Issues

Discovering that your Logitech iPad keyboard needs to be fixed can be frustrating, especially when you rely on it for seamless functionality. If your Logitech iPad keyboard is not working, check if your keyboard has enough power. Restart your device and check the compatibility of it with your PC. You can also update the device software to keep it working well. Why Is My Logitech iPad Keyboard Not Working? If your Logitech keyboard is malfunctioning, follow these easy steps for troubleshooting. Begin with fundamental checks, ensuring the keyboard has sufficient power and proper connections for both wireless and wired versions. Restart your device to refresh settings, check compatibility with Logitech’s information, and update your device’s software.  Additionally, troubleshoot using your device’s settings, and if issues persist, consider uninstalling and reinstalling keyboard drivers through the Device Manager. For professional assistance, reach out to Logitech customer support or visit a reputable repair store if all else fails. Easy Steps to Fix Your Malfunctioning Logitech Keyboard Before delving into intricate troubleshooting, let’s address fundamental steps: Power Check Ensure your keyboard has ample power. For wireless versions, check the battery or connect it to a power source. If wired, confirm the USB cable is properly connected. Bluetooth Verification If using a wireless keyboard, ensure Bluetooth is on and correctly paired with your device. Wired Connection Inspection For wired keyboards, confirm the USB cable is securely connected to your device. Restart Your Device A simple restart can often work wonders by refreshing the device’s settings and resolving minor issues. Check Compatibility Confirm that your device’s operating system is compatible with the Logitech Slim Folio Keyboard. Logitech offers comprehensive details regarding compatibility. Update Device Software To address compatibility issues, ensure your device has the latest updates, including the operating system and device drivers. Re-Pair Wireless Keyboards If the Logitech Keyboard is unresponsive wirelessly, re-pair it by forgetting or removing it in Bluetooth settings, turning it off and on, and reconnecting following the user manual’s pairing instructions. Inspect for Physical Damage Examine the keyboard for physical damage or debris. Clean keys and ensure no obstructions interfere with keypresses. Test on Another Device Connect the keyboard to another compatible device to determine if the issue is with the keyboard or the initial device. Update Keyboard Firmware Visit Logitech’s website to check for firmware updates for your specific keyboard model. Follow instructions to update if available. Disable Accessibility Features Ensure that accessibility features like Sticky Keys or Filter Keys are disabled in your device’s settings. Troubleshoot Using Device Settings Navigate to Settings on your computer, go to “Update & Security,” and choose “Troubleshoot.” Look for “Keyboard” under “Find and fix other problems” to initiate troubleshooting. Reinstall Keyboard Drivers Access the Device Manager by right-clicking the Start button. Under “Keyboards,” uninstall the Logitech Slim Folio keyboard. Restart your computer, plug in the keyboard, and let the drivers reinstall automatically. Seek Professional Support If all else fails, contact Logitech customer support for personalized assistance. Alternatively, consider visiting a reputable repair services store for expert guidance. Conclusion  Connecting your slim folio keyboard or Logitech Keyboard can indeed be irritating, but it doesn’t have to impede your productivity. Employing the troubleshooting steps recommended by the specialists can often help you pinpoint and swiftly address the issue.  Don’t let keyboard challenges hinder your progress—get back to typing and working efficiently! If you’re looking to get professional services in Mattydale, NY, then you should choose none other than Flash Fix Mobile for it. FAQs Q1. How do I reset my Logitech keyboard on my iPad? Start by unpairing and re-pairing the tool. Go to Settings > Bluetooth, find your Logitech keyboard within the list of devices, and pick “Forget This Device.” Then, restart your iPad and observe the pairing commands to reconnect the Logitech keyboard. Q2. How do I fix my iPad keyboard not typing? Ensure Bluetooth is enabled in Settings and the keyboard is well paired. If the difficulty persists, try restarting your iPad, as this could solve minor glitches. Test for software program updates in Settings > General > Software Update. Q3. How do I fix my Logitech keyboard that won’t type? Begin by checking the Bluetooth connection. Verify that Bluetooth is turned on for your iPad’s settings and that the Logitech keyboard is successfully paired

How to Maintain Battery Health on iPhone 14 Pro Max

In the ever-evolving world of smartphones, understanding the intricacies of your iPhone Pro Max’s battery health is crucial. Maintaining optimal battery health for your iPhone 14 Pro Max includes tweaking settings and adopting efficient charging practices to utilize advanced conservation techniques. These tips aim to empower users to preserve their device’s battery life. Why Do iPhone 14 Pro Max Battery Health Issues Arise? iPhone Pro Max battery health issues can arise due to various factors. Continuous charging and discharging, exposure to extreme temperatures, and overusing power-intensive applications can contribute to accelerated battery draining issues.  Additionally, over time, lithium-ion batteries, common in iPhones, undergo chemical changes that affect their overall capacity. Keeping your iPhone in a controlled environment, adopting efficient charging practices, and managing app usage are essential steps to mitigate battery health concerns.  Tips to Help You Maintain iPhone 14 Pro Max Battery Health Optimizing Settings for Longevity Manage screen brightness and switch to static wallpapers to reduce battery consumption. Enable low-power mode when appropriate to preserve battery life by minimizing system animations and updates. Efficient Charging Practices Adopt optimal charging cycles and use original chargers to prevent wear and tear. Avoid overcharging by unplugging your phone after reaching a full charge, and use certified chargers. Avoid Overcharging Charge your phone to full and unplug it when possible to minimize excess cycles and heat buildup. Avoid keeping your iPhone plugged in overnight to uphold the well-being of your battery. Advanced Battery Conservation Techniques Monitor battery usage by identifying and managing energy-intensive apps through regular reviews. Keep iOS updated and regulate background app activities to optimize energy usage, especially in low-coverage areas. Turn off Unused Features and Close Apps Disable unused features like Wi-Fi and Bluetooth to conserve battery life. Close unused apps to free up memory and processing power, preventing unnecessary strain on the battery. Additional Tips for Extending Battery Life Keep your iPhone in a controlled environment to avoid extreme temperatures that can harm battery capacity. Regularly update to the latest iOS version for battery optimizations and overall device performance improvements. Leverage battery-saving apps from the App Store to identify and manage apps consuming significant battery resources. Manage push notifications by deactivating them for less frequently used apps or disabling them entirely to preserve battery life. Conclusion As we conclude, in the ever-accelerating pace of technological advancements, safeguarding the longevity of your iPhone 14 Pro Max’s battery emerges as a paramount concern. As we navigate the landscape of innovation, these practices not only empower users to make informed choices but also ensure that their iPhone 14 Pro Max remains a reliable companion in the long run.  Lastly, if you’re looking for affordable iPhone repair services in Mattydale, then you should choose none other than Flash Fix Mobile, a leading cell phone repair shop in NY that offers cheap phone repair services. FAQs Q1. How do I keep my iPhone 14 Pro Max battery healthy? Don’t charge your phone’s battery completely. Up to 80% is ideal. You can also power it down to avoid additional use. Turn the brightness low and get rid of battery-draining apps. Q2. When should I charge my iPhone 14 Pro Max battery? Charge your iPhone 14 Pro Max when the battery is around 20% charge. Q3. How do I fix my iPhone 14 Pro Max battery draining fast? You can enable low-power mode to avoid excess battery drainage. You can also turn Wi-Fi and location services off and push notifications off when you’re not using your phone